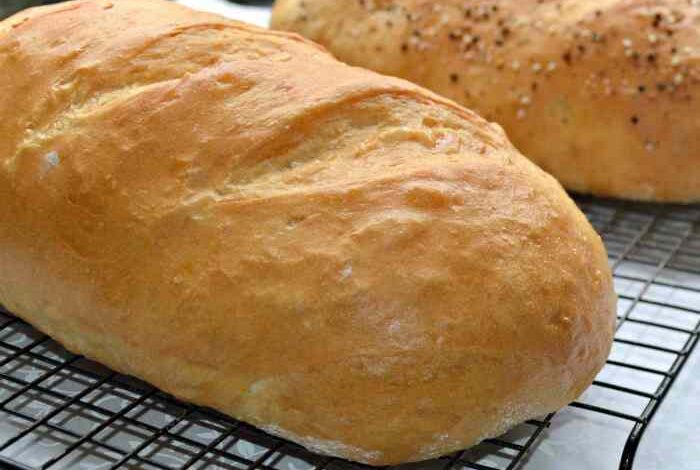
Italian Bread Baked on a Pizza Stone: A Guide to Crusty Perfection
Italian bread baked on a pizza stone sets the stage for this enthralling narrative, offering readers a glimpse into a story that is rich in detail and brimming with originality from the outset. The pizza stone, with its ability to distribute heat evenly and retain it for a long time, is the secret weapon for creating a crispy, golden-brown crust that is both visually appealing and texturally satisfying.
But it’s not just about the crust; the pizza stone also contributes to the overall texture and flavor of the bread, making it light, airy, and full of character. This guide will delve into the science behind baking Italian bread on a pizza stone, exploring the different types of bread that are best suited for this method, and providing step-by-step instructions for achieving a perfect loaf.
From the initial preparation of the dough to the final moments of baking, we’ll cover all the essential techniques that will elevate your homemade Italian bread to new heights. We’ll also discuss the art of creating a delicious crust, exploring the factors that contribute to its perfection and sharing tips for achieving the ideal texture and color.
Whether you’re a seasoned baker or a novice in the kitchen, this guide will empower you to create delicious Italian bread that will impress your family and friends.
The Science of Baking Italian Bread on a Pizza Stone
The use of a pizza stone is not just a culinary fad; it’s a scientific approach to baking Italian bread that yields exceptional results. The stone’s material and heat retention properties play a crucial role in achieving the perfect crust and texture.
The Material and Heat Retention Properties of a Pizza Stone
The material of a pizza stone, typically ceramic or cordierite, is essential for its heat-retaining capabilities. These materials are highly porous and have excellent thermal conductivity, allowing them to absorb and distribute heat evenly. When the stone is preheated, it acts as a miniature oven, radiating heat back onto the bread.
Heat Retention
- The stone’s high thermal mass enables it to absorb and store a significant amount of heat, creating a consistent and intense baking environment.
- This sustained heat ensures that the bread bakes evenly, preventing cold spots and promoting a well-developed crust.
Thermal Conductivity
- The stone’s high thermal conductivity allows heat to transfer quickly and evenly throughout its surface, resulting in uniform browning and a crispy crust.
- This rapid heat transfer also contributes to the formation of a crisp and flavorful crust, as the moisture in the dough evaporates quickly.
Benefits of Using a Pizza Stone
The use of a pizza stone offers several advantages over baking in a regular oven.
Improved Crust Formation
- The intense heat from the preheated stone creates a rapid rise in the dough’s temperature, promoting the Maillard reaction, which is responsible for the browning and flavor development of the crust.
- The stone’s even heat distribution ensures that the crust bakes evenly, preventing hot spots that can lead to uneven browning or burning.
Enhanced Texture
- The stone’s heat retention allows for a longer baking time, resulting in a more fully cooked bread with a crispy crust and a soft, airy interior.
- The stone’s porous surface helps to absorb excess moisture from the dough, preventing a soggy crust and promoting a drier, crispier texture.
Consistent Results
- The stone’s consistent heat distribution ensures that each loaf of bread bakes evenly, resulting in predictable and consistent results.
- The stone’s durability and long lifespan make it a worthwhile investment for any home baker.
Types of Italian Bread Suitable for Pizza Stone Baking
A pizza stone is a versatile tool that can elevate your baking game, especially when it comes to Italian bread. The stone’s ability to distribute heat evenly and retain it for a long time creates a crispy crust and a soft, airy interior, perfect for showcasing the unique characteristics of various Italian bread varieties.
Classic Italian Bread Varieties for Pizza Stone Baking
Pizza stones are ideal for baking a variety of classic Italian bread types, each with its own unique flavor and texture. Let’s explore some of the most popular choices:
- Ciabatta:Known for its airy, open crumb and chewy texture, ciabatta is a staple of Italian cuisine. Its distinctive shape, resembling a flat slipper, results from the high hydration of the dough, which allows for the development of large air pockets.
The crust, when baked on a pizza stone, is crisp and golden brown, providing a delightful contrast to the soft interior. Ciabatta is often enjoyed with olive oil and balsamic vinegar or used as a base for sandwiches.
- Focaccia:This flatbread is characterized by its dimpled surface, created by pressing your fingertips into the dough before baking. Focaccia is typically seasoned with herbs, olive oil, and salt, resulting in a flavorful and aromatic bread. The pizza stone helps to create a crispy, slightly charred crust, enhancing the overall flavor and texture.
Focaccia is versatile and can be enjoyed on its own, served with dips, or used as a base for pizzas.
- Pane Toscano:A rustic bread originating from Tuscany, Pane Toscano is known for its dense, chewy texture and thick crust. The dough is typically made with a high percentage of whole wheat flour, resulting in a hearty and flavorful bread. The pizza stone helps to develop a deep golden brown crust and a crispy exterior, while the interior remains soft and slightly moist.
Pane Toscano is often served with olive oil and balsamic vinegar or used as a base for sandwiches.
- Pizza Dough:While technically not a bread variety, pizza dough benefits significantly from baking on a pizza stone. The stone’s high heat and even distribution ensure a perfectly crispy crust with a slight char, allowing the toppings to cook evenly. The stone also helps to prevent the dough from becoming soggy, resulting in a delicious and satisfying pizza.
Baking Techniques and Temperatures
The baking techniques and temperatures for each bread variety may vary slightly, but here are some general guidelines:
- Preheat the pizza stone:Always preheat the pizza stone to the desired temperature before baking any bread. This ensures that the bread cooks evenly and develops a crispy crust. For most Italian bread varieties, a preheating temperature of 450°F (232°C) is recommended.
- Score the bread:Scoring the bread before baking helps to control the expansion of the dough and create a more even rise. Use a sharp knife or a razor blade to make shallow cuts across the surface of the bread.
- Bake until golden brown:Bake the bread until the crust is golden brown and the internal temperature reaches 190°F (88°C). You can use a meat thermometer to check the temperature.
- Cool the bread:Once the bread is baked, let it cool on a wire rack before slicing and serving. This allows the bread to cool evenly and prevents condensation from forming on the crust.
Preparing the Dough and Shaping the Bread
The magic of baking Italian bread on a pizza stone truly begins with the dough. A well-crafted dough, kneaded with care and allowed to rise slowly, is the foundation for a crust that’s both flavorful and satisfying. Let’s explore the art of preparing and shaping the dough, ensuring a delightful outcome for your Italian bread baking adventures.
The crust of that Italian bread, baked on a pizza stone, always comes out so perfectly crisp. It’s the ideal accompaniment to a juicy roast leg of lamb , especially when paired with a vibrant salad. And speaking of the pizza stone, I’ve been meaning to try baking focaccia on it next – I think it would be amazing!
Preparing the Dough
A basic Italian bread dough relies on a few simple ingredients: flour, water, yeast, and salt. The exact proportions can vary depending on the type of flour and the desired texture, but the fundamental principles remain consistent. Here’s a traditional approach to preparing Italian bread dough:
Ingredients:* 4 cups (500g) all-purpose flour, plus more for dusting
- 1 1/2 cups (360ml) warm water (105-115°F)
- 1 1/4 tsp (7g) active dry yeast
- 1 1/2 tsp (9g) salt
Instructions:
1. Activate the yeast
In a large bowl, combine the warm water and yeast. Let it sit for 5-10 minutes until the yeast becomes foamy, indicating it’s active.
2. Combine the ingredients
Add the flour and salt to the yeast mixture. Use a wooden spoon to stir until the dough comes together into a shaggy mass.
The aroma of freshly baked Italian bread, its crust crackling with a satisfying crunch, always reminds me of cozy evenings. I love the way the heat of the pizza stone brings out its best, creating a perfect companion for a hearty meal.
And speaking of hearty meals, have you tried an oven roasted boneless leg of lamb ? It’s a true culinary delight, especially when paired with the rustic charm of a crusty Italian loaf. The flavors complement each other so well, making for a truly satisfying dining experience.
3. Knead the dough
Turn the dough out onto a lightly floured surface. Knead for 8-10 minutes, or until the dough becomes smooth and elastic. You can tell it’s ready when it bounces back slightly when poked.
4. First rise
Place the dough in a lightly oiled bowl, turning it to coat all sides. Cover the bowl with plastic wrap and let the dough rise in a warm place for 1-2 hours, or until it doubles in size.
5. Punch down
Once the dough has risen, gently punch it down to release the air bubbles.
6. Second rise
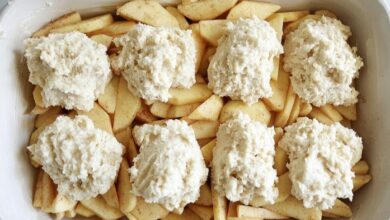
Shape the dough into your desired form (see below) and place it on a lightly floured baking sheet or in a greased loaf pan. Cover with plastic wrap and let it rise for another 30-45 minutes, or until it’s nearly doubled in size.
7. Preheat the pizza stone
While the dough is rising, preheat your pizza stone in the oven to 450°F (232°C).
8. Bake
Bake the bread on the preheated pizza stone for 20-25 minutes, or until it’s golden brown and sounds hollow when tapped.
Shaping the Bread
The beauty of Italian bread lies in its versatility. From classic loaves to rustic rolls, the dough can be molded into various shapes to suit your preferences. Here are a few popular Italian bread forms:
Round Loaf:
1. Divide the dough
Divide the dough into two equal portions.
2. Shape the loaves
Form each portion into a smooth, round ball.
3. Proofing
Place the loaves on a lightly floured baking sheet, cover with plastic wrap, and let them rise for 30-45 minutes. Loaf:
1. Shape the loaf
Form the dough into a long, rectangular loaf.
2. Proofing
There’s something magical about the crispy crust you get when you bake Italian bread on a pizza stone. It’s a simple technique, but it elevates the bread to a whole new level of deliciousness. And speaking of deliciousness, I recently tried a Dave’s Low Country Boil and it was absolutely incredible.
The flavors were so bold and complex, it reminded me of the richness you get when you bake bread on a hot pizza stone. I think I’ll have to try making a low country boil at home, but I’ll definitely be using my pizza stone for the next batch of Italian bread!
Place the loaf on a lightly floured baking sheet, cover with plastic wrap, and let it rise for 30-45 minutes. Focaccia:
1. Spread the dough
Press the dough into a lightly oiled baking sheet, leaving a slight edge around the perimeter.
2. Top with ingredients
Brush the dough with olive oil and sprinkle with herbs, salt, and pepper.
3. Proofing
Let the focaccia rise for 30-45 minutes, or until it’s puffy. Rolls:
1. Divide the dough
Divide the dough into equal portions, depending on the desired size of the rolls.
2. Shape the rolls
Roll each portion into a ball or a long, thin shape.
3. Proofing
Place the rolls on a lightly floured baking sheet, cover with plastic wrap, and let them rise for 30-45 minutes.
Scoring the Bread
Scoring, or making shallow cuts on the surface of the bread before baking, serves two purposes:
Aesthetic Appeal:Scoring creates a beautiful pattern on the crust, enhancing its visual appeal. Even Baking:The cuts allow steam to escape during baking, preventing the bread from cracking and promoting even rising.
Scoring Techniques:
1. Use a sharp knife or razor blade
A sharp blade ensures clean, precise cuts.
2. Make shallow cuts
Don’t cut all the way through the dough; just make shallow incisions.
3. Create a pattern
There are various scoring patterns, from simple slashes to intricate designs.
Baking Italian Bread on the Pizza Stone

The heart of baking Italian bread on a pizza stone lies in understanding how to leverage the stone’s heat retention properties for achieving a crispy crust and a soft, pillowy interior.
Preheating the Pizza Stone and Transferring the Bread
Preheating the pizza stone is crucial for ensuring even heat distribution and a crispy crust. This process involves placing the stone in a cold oven and gradually raising the temperature to the desired level. The ideal temperature for baking Italian bread on a pizza stone is between 400°F and 450°F (200°C to 230°C).
- Place the pizza stone on the middle rack of your oven.
- Preheat the oven to the desired temperature for at least 30 minutes.
- Once the oven has reached the desired temperature, carefully slide the bread onto the hot pizza stone using a pizza peel or a baking sheet.
Baking Time and Temperature
The baking time and temperature for Italian bread will vary depending on the size and shape of the loaf. Generally, a medium-sized loaf of Italian bread will take approximately 30-40 minutes to bake at 425°F (220°C).
- For a crispy crust, bake the bread at a higher temperature for a shorter duration.
- For a softer crust, bake the bread at a lower temperature for a longer duration.
Monitoring the Baking Process
It’s essential to monitor the baking process closely to ensure the bread bakes evenly and develops a beautiful golden-brown crust.
- Use a thermometer to check the internal temperature of the bread. The bread is done when the internal temperature reaches 190°F (88°C).
- Keep an eye on the bread’s color. It should be golden brown and slightly darker on the bottom due to the heat of the pizza stone.
- If the bread starts to brown too quickly, reduce the oven temperature slightly.
- If the bread is not browning enough, increase the oven temperature slightly.
The Art of Creating a Delicious Crust
The crust is the defining element of any good Italian bread. It’s the first thing you see, the first thing you smell, and the first thing you taste. A perfect Italian bread crust should be both beautiful and delicious, with a satisfying crunch that gives way to a soft and chewy interior.
Several factors contribute to a perfect Italian bread crust, from the type of flour used to the baking temperature and the length of time the bread spends in the oven. Understanding these factors and how they interact is crucial for achieving a crust that is both visually appealing and texturally satisfying.
Types of Crusts
The type of crust you desire for your Italian bread will depend on your personal preference and the intended use of the bread. Here’s a comparison of different crust types, their characteristics, and the baking techniques that produce them:
| Crust Type | Characteristics | Baking Techniques | Desired Result |
|---|---|---|---|
| Crispy | Thin, golden brown, and crunchy. | High baking temperature, short baking time, and a generous amount of steam during the initial stages of baking. | A bread with a satisfying crunch and a light, airy interior. |
| Chewy | Thick, slightly brown, and soft with a slight chewiness. | Lower baking temperature, longer baking time, and minimal steam. | A bread with a soft, chewy texture and a flavorful crust. |
| Soft | Thin, pale, and soft with a slight chewiness. | Lower baking temperature, short baking time, and minimal steam. | A bread with a soft, pillowy texture and a delicate crust. |
Achieving a Crispy Crust, Italian bread baked on a pizza stone
A crispy crust is a hallmark of great Italian bread. Here are some techniques to help you achieve that satisfying crunch:
- Use high-protein flour:High-protein flour, like bread flour, contains more gluten, which develops a strong structure that can withstand the high temperatures needed for a crispy crust.
- Create steam:Steam during the initial stages of baking helps to create a soft and moist interior while simultaneously promoting a crispy crust. This can be achieved by using a baking stone or by placing a pan of water in the oven.
- High baking temperature:Baking your bread at a high temperature (around 450°F) promotes rapid browning and creates a crispy crust.
- Score the bread:Scoring the bread before baking allows steam to escape, which prevents the crust from becoming soggy.
- Don’t overbake:Overbaking can lead to a dry and hard crust. It’s important to monitor the bread closely and remove it from the oven when the crust is golden brown and the internal temperature reaches 200°F.
Serving and Enjoying Your Homemade Italian Bread: Italian Bread Baked On A Pizza Stone

The moment you pull your freshly baked Italian bread from the oven, you’ll be met with a heavenly aroma that’s impossible to resist. But before you dig in, let’s explore the best ways to serve and store your creation, ensuring you enjoy its deliciousness to the fullest.
Serving Suggestions
The beauty of Italian bread lies in its versatility. It’s a blank canvas, ready to be adorned with a multitude of toppings and accompaniments. Here are some ideas to inspire your culinary creativity:
- Simple Elegance:Drizzle with olive oil and sprinkle with sea salt for a classic and satisfying experience.
- Herbed Delight:Brush with garlic butter and sprinkle with fresh herbs like rosemary, thyme, or oregano for a flavorful twist.
- Sweet and Savory:Top with honey and toasted walnuts for a sweet and savory combination that’s both comforting and delicious.
- Mediterranean Fusion:Spread with hummus and top with chopped tomatoes, cucumbers, and feta cheese for a vibrant and healthy option.
Accompaniments
Italian bread pairs beautifully with a variety of dishes, making it a versatile addition to any meal.
| Dish | Accompaniment |
|---|---|
| Pasta dishes | Garlic bread, focaccia, or breadsticks |
| Salads | Croutons, breadsticks, or slices of bread for dipping |
| Soups | Crusty bread for dipping or grilled bread for croutons |
| Stews | Thick slices of bread for soaking up the flavorful broth |
| Charcuterie boards | A variety of bread shapes and sizes for serving meats, cheeses, and olives |
Using Leftover Bread
Don’t let leftover Italian bread go to waste! It can be transformed into a variety of delicious treats.
- Breadcrumbs:Pulse leftover bread in a food processor to create breadcrumbs for coating chicken, fish, or vegetables.
- Bread Pudding:Soak leftover bread in a custard mixture and bake for a comforting dessert.
- French Toast:Dip slices of bread in a batter of eggs, milk, and spices and pan-fry for a delightful breakfast or brunch option.
- Croutons:Cube leftover bread and toss with olive oil, herbs, and spices. Bake until crispy for a crunchy topping for salads or soups.