
Bread Machine Pizza Dough: Easy Homemade Crust
Bread machine pizza dough is a game-changer for pizza lovers! Imagine fresh, homemade pizza crust without the hassle of hand-kneading. Your bread machine does the work for you, leaving you free to focus on the delicious toppings. This simple method unlocks the potential for countless pizza variations, from classic pepperoni to gourmet creations.
Whether you’re a seasoned pizza pro or a beginner in the kitchen, bread machine pizza dough offers a convenient and rewarding way to enjoy homemade pizza. The key lies in understanding the basic ingredients, adjusting settings for your desired crust, and mastering a few simple techniques.
This post will guide you through every step, from the machine to the oven, ensuring you create a pizza masterpiece.
Bread Machine Pizza Dough

Pizza night just got easier! A bread machine can be your secret weapon for creating delicious homemade pizza dough, without the need for extensive kneading or hand-mixing.
My bread machine is a lifesaver when it comes to pizza dough – it’s so easy and always turns out perfectly chewy. But sometimes, I crave something lighter and more delicate, like the chicken and mushroom crepes I found on that awesome food blog.
They’re a perfect way to use up leftover chicken, and the creamy mushroom sauce is divine. But for pure pizza satisfaction, there’s nothing quite like that warm, cheesy goodness from my bread machine dough.
The Advantages of Using a Bread Machine
Using a bread machine for pizza dough offers several advantages:
- Effortless Kneading:The bread machine does the hard work for you, saving you time and energy. You can simply add the ingredients and let the machine do its thing.
- Consistent Results:The bread machine’s consistent mixing and kneading ensures a uniform dough texture, leading to consistently delicious pizzas.
- Hands-Free Convenience:You can use the time saved from kneading to prepare your pizza toppings or get other things done while the dough is being made.
Key Ingredients for Pizza Dough, Bread machine pizza dough
The key ingredients for pizza dough are simple, but their proportions and quality are crucial for a successful outcome:
- Flour:All-purpose flour is the most common choice for pizza dough, but you can also experiment with bread flour for a chewier crust. Flour provides the structure and texture of the dough.
- Water:The amount of water used will determine the hydration of the dough, affecting its texture and chewiness. More water results in a wetter, more elastic dough, while less water creates a drier, more crumbly dough.
- Yeast:Active dry yeast is the most common type used for pizza dough. It ferments the dough, producing carbon dioxide bubbles that give the crust its airy texture.
- Salt:Salt enhances the flavor of the dough and controls the yeast’s activity, preventing it from becoming too active.
- Olive Oil:A small amount of olive oil adds richness and flavor to the dough, making it more tender and pliable.
Making Pizza Dough in a Bread Machine
Here’s a step-by-step guide for making pizza dough in a bread machine:
- Gather your ingredients:Measure out all the ingredients according to your chosen recipe. Make sure your yeast is active by dissolving it in warm water before adding it to the bread machine.
- Add ingredients to the bread machine:Add the ingredients to the bread machine in the order specified by your recipe. Most bread machines have a specific order for adding ingredients, so it’s essential to follow the instructions.
- Select the dough cycle:Choose the “dough” cycle on your bread machine. This cycle will mix, knead, and rise the dough to the perfect consistency.
- Allow the dough to rise:Let the bread machine complete the dough cycle. This will typically take about 1-2 hours. Once the cycle is complete, remove the dough from the machine and shape it into a ball.
- Rest the dough:Place the dough ball in a lightly oiled bowl, cover it with plastic wrap, and let it rise for another 30-60 minutes, or until doubled in size. This allows the dough to develop its flavor and texture.
- Preheat your oven and prepare your pizza:Preheat your oven to 450-500°F (232-260°C). While the oven is preheating, stretch or roll out the dough to your desired thickness. Top with your favorite pizza toppings and bake until the crust is golden brown and the cheese is melted and bubbly.
Variations for Different Crust Types
- Thin Crust:For a thin crust, use a slightly lower hydration level in your dough recipe, resulting in a less elastic and more easily stretched dough. You can also use a rolling pin to roll out the dough to a very thin thickness.
- Thick Crust:For a thicker crust, use a higher hydration level, resulting in a more elastic dough that will rise higher and create a thicker base. You can also shape the dough into a thicker crust by using your hands to form it into a deep dish or pan pizza.
- Deep Dish:For a deep dish pizza, use a higher hydration level and a slightly longer rise time. Shape the dough into a deep dish pan and bake until the crust is cooked through and the toppings are bubbly.
Understanding Bread Machine Settings

The bread machine is a great tool for making pizza dough, but understanding the settings is crucial to achieve the desired crust texture and flavor. Each bread machine has its own set of settings, but some common settings can be adjusted to create the perfect pizza dough.
Settings Impact on Dough
The bread machine settings influence the kneading time, rise time, and bake time, which directly affect the dough’s texture and flavor.
- Kneading Time:Longer kneading time develops gluten, resulting in a chewier and more elastic crust. Shorter kneading time creates a softer and more tender crust.
- Rise Time:A longer rise time allows the yeast to ferment, resulting in a lighter and airier crust with a more complex flavor. A shorter rise time yields a denser and more compact crust.
- Bake Time:The bake time is primarily used for baking the pizza, not the dough. However, some bread machines have a setting to pre-bake the dough before shaping it into a pizza.
Adjusting Settings for Desired Crust
- Thin and Crispy Crust:For a thin and crispy crust, choose a setting with a shorter kneading time and a shorter rise time. This will result in a dough that is less elastic and more likely to spread during baking.
- Thick and Chewy Crust:For a thick and chewy crust, choose a setting with a longer kneading time and a longer rise time. This will result in a dough that is more elastic and will hold its shape better during baking.
- Flavor:A longer rise time will allow the yeast to ferment longer, resulting in a more complex flavor.
Tips and Techniques for Success
While using a bread machine for pizza dough can be convenient, some challenges may arise. This section will explore common difficulties and provide solutions to ensure a successful pizza dough experience.
Bread machine pizza dough is a lifesaver for busy weeknights – it’s so easy to make and always turns out delicious. While I’m waiting for the dough to rise, I often whip up a batch of overnight corn flake bake for a sweet treat the next morning.
It’s the perfect combination of convenience and flavor, just like my go-to bread machine pizza dough!
Troubleshooting Common Issues
Pizza dough made in a bread machine can sometimes stick to the pan, rise unevenly, or lack the desired gluten development. These issues can be addressed with proper techniques and adjustments.
- Dough Sticking: The primary cause of dough sticking is inadequate flour or excess moisture. Ensure you use high-quality flour, preferably bread flour, which has a higher protein content. To prevent sticking, lightly grease the bread machine pan with cooking spray or olive oil before adding ingredients.
If the dough still sticks, try reducing the amount of water by a tablespoon at a time.
- Uneven Rising: Uneven rising can occur if the dough is not properly kneaded or if the bread machine’s temperature is inconsistent. Ensure the dough is properly kneaded by selecting the appropriate dough cycle on your bread machine. Consider preheating the bread machine for a few minutes before starting the dough cycle to ensure a consistent temperature.
My bread machine is a real workhorse, churning out delicious pizza dough in a flash. It reminds me of another doughy delight, the south african traditional vetkoek fried bread , which is also made with simple ingredients and a bit of patience.
Both are so versatile, and I can’t wait to try out some new topping combinations for my next pizza night!
- Under-developed Gluten: Gluten development is crucial for a chewy pizza crust. Insufficient kneading can result in a dough that lacks structure. Select a longer kneading cycle on your bread machine or use the “dough” setting to allow for extended kneading.
Achieving Perfect Dough Consistency
Consistency is key for a delicious pizza. Here are some tips and tricks for achieving the perfect pizza dough:
- Use High-Quality Flour: Bread flour, with its higher protein content, is ideal for pizza dough as it provides the necessary structure and chewiness.
- Control Hydration: The amount of water in the dough significantly impacts its texture. Start with the recommended recipe and adjust as needed based on the flour’s absorption.
- Proper Kneading: Ensure the dough is kneaded for the recommended time to develop the gluten. A well-kneaded dough will be smooth and elastic.
- Rest the Dough: After kneading, let the dough rest for at least 30 minutes to relax the gluten and develop flavor.
- Temperature Control: Keep the dough at a warm temperature (around 75°F or 24°C) for optimal rising. Avoid extreme temperatures, as they can hinder yeast activity.
Beyond the Basics
Now that you’ve mastered the fundamentals of bread machine pizza dough, let’s explore the exciting world of variations and customizations. With a little creativity, you can transform your basic recipe into a symphony of flavors and textures.
Recipe Variations
This section delves into various pizza dough recipes, offering different crust thicknesses, flavor profiles, and ingredient substitutions. You can adjust the recipe to suit your taste and dietary needs.
Crust Thickness
A table illustrating various crust thicknesses and their corresponding recipe adjustments is presented below:| Crust Type | Flour (cups) | Water (cups) | Yeast (tsp) | Salt (tsp) | Olive Oil (tbsp) | Notes ||—|—|—|—|—|—|—|| Thin Crust | 2 1/2 | 1 1/4 | 1 1/2 | 1 1/2 | 1 | Use less water for a crispier crust.
|| Medium Crust | 3 | 1 1/2 | 1 1/2 | 1 1/2 | 1 | A good balance of thickness and chewiness. || Deep Dish | 3 1/2 | 1 3/4 | 1 1/2 | 1 1/2 | 1 | Use more water for a thicker, more substantial crust.
|
Flavor Profiles
Adding different ingredients to your pizza dough can create unique flavors. Here are some examples:| Flavor | Ingredient | Notes ||—|—|—|| Garlic | 1-2 cloves garlic, minced | Add to the dough for a subtle garlic flavor. || Herb | 1 tbsp dried herbs (oregano, basil, thyme) | Add to the dough for a fragrant and flavorful crust.
|| Cheese | 1/2 cup shredded mozzarella | Add to the dough for a cheesy flavor and a slightly softer texture. |
Ingredient Substitutions
You can easily adapt the recipe to accommodate dietary needs or preferences. For example:| Ingredient | Substitution | Notes ||—|—|—|| All-purpose flour | Whole wheat flour | Use a 1:1 ratio for a heartier, nuttier flavor. || Yeast | Active dry yeast | Substitute with active dry yeast in the same amount.
|| Water | Milk | Use warm milk for a richer flavor and softer texture. |
Different Types of Pizza Dough
This section presents recipes for different types of pizza dough, including thin crust, deep dish, and gluten-free options.
Thin Crust Pizza Dough
This recipe yields a thin, crispy crust perfect for classic pizzas.
Ingredients:* 2 1/2 cups all-purpose flour
- 1 1/4 cups warm water
- 1 1/2 tsp active dry yeast
- 1 1/2 tsp salt
- 1 tbsp olive oil
Instructions:
- Combine all ingredients in the bread machine and select the “dough” setting.
- Allow the machine to knead the dough for 10-15 minutes.
- Remove the dough and let it rise in a greased bowl for 30-45 minutes.
- Preheat oven to 450 degrees F (232 degrees C).
- Roll out the dough to your desired thickness and shape.
- Top with your favorite pizza toppings and bake for 10-15 minutes, or until the crust is golden brown and the cheese is melted and bubbly.
Deep Dish Pizza Dough
This recipe yields a thick, deep-dish crust perfect for Chicago-style pizzas.
Ingredients:* 3 1/2 cups all-purpose flour
- 1 3/4 cups warm water
- 1 1/2 tsp active dry yeast
- 1 1/2 tsp salt
- 1 tbsp olive oil
Instructions:
- Combine all ingredients in the bread machine and select the “dough” setting.
- Allow the machine to knead the dough for 10-15 minutes.
- Remove the dough and let it rise in a greased bowl for 30-45 minutes.
- Preheat oven to 425 degrees F (220 degrees C).
- Press the dough into a greased 9-inch deep-dish pie pan.
- Top with your favorite pizza toppings and bake for 20-25 minutes, or until the crust is golden brown and the cheese is melted and bubbly.
Gluten-Free Pizza Dough
This recipe uses gluten-free flour blend to create a delicious and satisfying gluten-free crust.
Ingredients:* 2 1/2 cups gluten-free flour blend
- 1 1/4 cups warm water
- 1 1/2 tsp active dry yeast
- 1 1/2 tsp salt
- 1 tbsp olive oil
- 1 tsp xanthan gum (optional)
Instructions:
- Combine all ingredients in the bread machine and select the “dough” setting.
- Allow the machine to knead the dough for 10-15 minutes.
- Remove the dough and let it rise in a greased bowl for 30-45 minutes.
- Preheat oven to 450 degrees F (232 degrees C).
- Roll out the dough to your desired thickness and shape.
- Top with your favorite pizza toppings and bake for 10-15 minutes, or until the crust is golden brown and the cheese is melted and bubbly.
Pizza Dough in Action
The moment of truth has arrived! Your bread machine has diligently crafted a delicious pizza dough, and now it’s time to transform it into a culinary masterpiece. This section guides you through the process of shaping, handling, and baking your pizza dough, culminating in a delectable, homemade creation.
Shaping the Dough
Once the dough cycle is complete, remove it from the bread machine and place it on a lightly floured surface. Gently knead the dough for a few seconds to ensure it’s smooth and elastic. Divide the dough into portions depending on the size of the pizzas you want to make.
For a standard 12-inch pizza, use about 2/3 of the dough.
Preparing the Pizza
- Prepare the crust:Lightly flour a pizza stone or baking sheet. Use a rolling pin or your hands to flatten the dough portion into a circle or rectangle, depending on your preference. The crust should be about 1/4 inch thick.
- Add the sauce:Spread a thin layer of your favorite pizza sauce over the dough. You can use store-bought sauce or make your own.
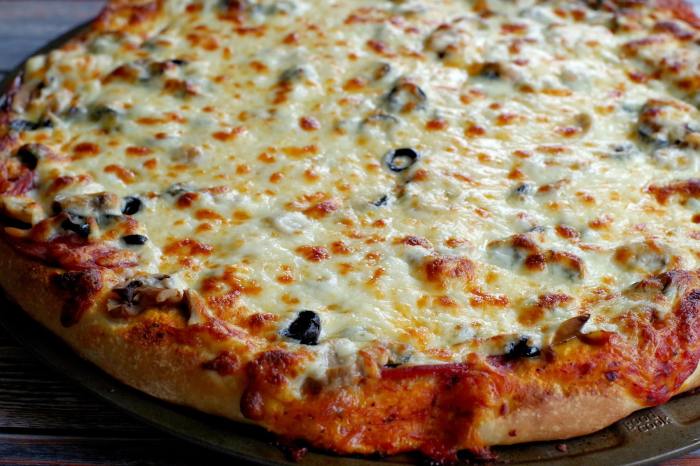
- Add the cheese:Sprinkle a generous amount of shredded mozzarella cheese over the sauce.
- Add the toppings:Now it’s time to get creative! Add your favorite toppings, such as pepperoni, sausage, mushrooms, onions, peppers, olives, or any other vegetables you enjoy.
Baking the Pizza
- Preheat the oven:Preheat your oven to 450°F (232°C) for at least 30 minutes. A hot oven ensures a crispy crust.
- Bake the pizza:Carefully slide the pizza onto the preheated pizza stone or baking sheet. Bake for 10-15 minutes, or until the crust is golden brown and the cheese is melted and bubbly.
- Let it cool:Remove the pizza from the oven and let it cool slightly before slicing and serving.
Tips for a Perfect Pizza
- Use a pizza stone:A pizza stone helps to distribute heat evenly and create a crispy crust.
- Don’t over-crowd the toppings:Too many toppings can make the pizza soggy.
- Experiment with toppings:Don’t be afraid to try new combinations of toppings.
- Use a pizza cutter:A pizza cutter makes it easy to slice the pizza into even pieces.