Dry Aged Prime Rib: A Culinary Masterpiece
Dry aged prime rib is a culinary masterpiece that elevates the humble roast to a level of unparalleled flavor and tenderness. This meticulous process, involving controlled aging in a specific environment, transforms the meat into a luxurious treat, leaving even the most discerning palate satisfied.
The dry-aging process involves exposing the meat to controlled temperature, humidity, and airflow, allowing for the natural breakdown of proteins and the development of rich, complex flavors. The result is a meat that boasts a deep, savory character, an incredibly tender texture, and a stunning marbling pattern that speaks volumes about its quality.
What is Dry-Aged Prime Rib?
Dry-aged prime rib is a cut of beef that has been aged in a controlled environment for several weeks. This process allows the enzymes in the meat to break down the muscle fibers, resulting in a more tender, flavorful, and concentrated product.
Dry-aging is a traditional method of preserving meat that has been used for centuries.
The Dry-Aging Process
Dry-aging involves storing meat in a temperature and humidity-controlled environment, typically between 34°F and 38°F (1°C and 3°C) with a relative humidity of around 80%. This process allows for the natural breakdown of muscle fibers and the development of a concentrated flavor profile.
During dry-aging, the moisture content of the meat evaporates, resulting in a loss of weight. This weight loss is referred to as “shrinkage,” and it can range from 10% to 20% of the original weight.
Benefits of Dry-Aging
Dry-aging offers several benefits, including:
Enhanced Flavor
During dry-aging, the enzymes in the meat break down proteins, releasing amino acids that contribute to a richer, more complex flavor. The process also concentrates the natural flavors of the beef, resulting in a more intense taste.
Increased Tenderness
The breakdown of muscle fibers during dry-aging makes the meat more tender. This is because the enzymes break down the connective tissues that hold the muscle fibers together.
Improved Marbling
Dry-aging can improve the marbling of the meat. This is because the fat within the meat becomes more evenly distributed as the moisture evaporates.
Dry-Aging vs. Wet-Aging
Dry-aging is distinct from wet-aging, which involves storing meat in a vacuum-sealed bag. Wet-aging typically takes place for a shorter period of time than dry-aging and results in less moisture loss. Wet-aging can also help to tenderize the meat, but it does not produce the same depth of flavor or the concentrated flavor profile that is characteristic of dry-aged beef.
The Science Behind Dry-Aging
Dry-aging is a fascinating process that transforms ordinary beef into a culinary masterpiece. It’s not just about letting the meat sit in a cool, controlled environment. The magic happens due to a complex interplay of enzymatic and microbial activity.
Enzymatic and Microbial Processes
Dry-aging involves a series of biochemical reactions that break down muscle fibers and enhance flavor.
- Enzymes:The meat contains natural enzymes, such as proteases and lipases. These enzymes break down proteins and fats, respectively, resulting in tenderization and flavor development. Proteases break down muscle fibers, making the meat more tender. Lipases break down fats, releasing free fatty acids that contribute to the rich, savory flavor of dry-aged beef.
- Microorganisms:A controlled environment allows beneficial bacteria to grow on the surface of the meat. These bacteria contribute to the development of flavor and aroma. They break down proteins and fats, further tenderizing the meat and adding complex flavors. While some bacteria can cause spoilage, the controlled environment of dry-aging prevents this.
Effects on Moisture Content and Texture
Dry-aging results in a significant reduction in moisture content. As the meat ages, water evaporates from the surface, leading to a concentrated flavor and a firmer texture.
- Moisture Loss:The evaporation of moisture is a natural consequence of the dry-aging process. The loss of moisture can be as high as 10-20%, depending on the duration of aging. This loss of moisture concentrates the flavor and creates a more intense taste.
- Texture:The loss of moisture and the breakdown of muscle fibers contribute to a more tender and flavorful texture. The meat becomes more dense and firm, with a distinctive, almost crumbly texture. This unique texture is a hallmark of dry-aged beef.
Role of Temperature, Humidity, and Airflow
Dry-aging requires a carefully controlled environment to ensure optimal conditions for the enzymatic and microbial processes.
- Temperature:The ideal temperature for dry-aging is between 34°F and 38°F (1°C to 3°C). This temperature range allows for slow enzymatic activity and controlled microbial growth. Too high a temperature can accelerate spoilage, while too low a temperature can slow down the aging process.
- Humidity:The humidity level should be around 80%. This helps to prevent excessive moisture loss and ensures that the meat does not dry out too quickly. High humidity also promotes the growth of beneficial bacteria. Too low humidity can cause the meat to dry out excessively, resulting in a tough and dry texture.
- Airflow:Proper airflow is crucial for removing excess moisture and preventing mold growth. The airflow should be consistent and gentle, ensuring that the meat is exposed to fresh air without being dried out too quickly. The airflow helps to create a dry environment that promotes the growth of beneficial bacteria.
Selecting and Preparing Dry-Aged Prime Rib
Dry-aged prime rib is a culinary masterpiece, and selecting the right cut and preparing it properly will elevate your dining experience to new heights. The process of dry-aging adds depth of flavor and tenderness to the meat, making it a true gourmet treat.
Here’s a guide to selecting and preparing a perfect dry-aged prime rib.
Dry aged prime rib is a culinary masterpiece, a symphony of flavor and texture that requires a patient hand and a discerning palate. While it’s certainly the star of the show, a lighter, brighter counterpoint can be found in the form of crustless cottage cheese mini quiches.
These bite-sized delights offer a refreshing contrast to the richness of the prime rib, their delicate flavors complementing the meat’s robust character without overwhelming the senses.
Choosing the Right Cut
When selecting a dry-aged prime rib, you’ll want to ensure you’re getting the best quality. Here are some factors to consider:* Marbling:Look for a cut with good marbling, which refers to the intramuscular fat that gives the meat its flavor and tenderness.
The more marbling, the more flavorful and juicy the prime rib will be.
Dry aged prime rib is a culinary masterpiece, but sometimes you need a lighter, quicker meal. That’s where a quick strawberry oatmeal breakfast smoothie comes in. It’s the perfect way to start your day with a burst of flavor and energy, leaving you ready to tackle any culinary challenge, like perfectly carving that dry aged prime rib!
Bone-in vs. Boneless
Bone-in prime rib retains more moisture during cooking and provides a richer flavor, while boneless prime rib is easier to carve and cook.
Aging Time
Dry-aging typically takes between 21 and 45 days. The longer the aging time, the more intense the flavor and the more tender the meat.
Meat Color
The color of the meat should be a deep, rich red. Avoid cuts that are pale or have a grayish hue.
Smell
Fresh dry-aged prime rib should have a pleasant, earthy aroma. If it has a sour or ammonia-like smell, it may be spoiled.
Determining the Optimal Size and Weight
The size and weight of the dry-aged prime rib you choose will depend on the number of people you’re serving. * General Rule:A good rule of thumb is to allow 1 pound of dry-aged prime rib per person.
Consider Bone-in vs. Boneless
Bone-in prime rib will yield less edible meat per pound than boneless prime rib.
Preparing Dry-Aged Prime Rib for Cooking
Proper preparation is key to maximizing the flavor and tenderness of your dry-aged prime rib. * Trimming:Trim any excess fat from the prime rib, leaving a thin layer for flavor and moisture.
Seasoning
Season the prime rib generously with salt and pepper. You can also add other seasonings like garlic powder, onion powder, or herbs.
Resting
Dry-aged prime rib is a classic for a reason—that deep, rich flavor is unmatched. But sometimes, I crave something a little more down-home, like tender, smoky bbq country style ribs. Both are amazing, and I love how they both offer that satisfying, meaty bite.
But when I’m really feeling fancy, nothing beats a perfectly carved dry-aged prime rib.
Allow the dry-aged prime rib to rest at room temperature for 30 minutes before cooking. This will help ensure even cooking.
Cooking Methods for Dry-Aged Prime Rib: Dry Aged Prime Rib
Dry-aged prime rib is a culinary masterpiece, and its rich flavor and tender texture are best achieved through proper cooking methods. There are several techniques you can use to cook dry-aged prime rib, each with its own unique benefits and considerations.
Roasting
Roasting is the most common and straightforward method for cooking dry-aged prime rib. This method allows the meat to cook evenly and develop a beautiful crust. Here are the steps involved in roasting dry-aged prime rib:
- Preheat the oven:Preheat your oven to 450°F (232°C). This high initial temperature helps to sear the exterior of the roast and lock in moisture.
- Season the roast:Season the prime rib generously with salt, pepper, and any other desired herbs or spices. You can also use a dry rub for added flavor.
- Roast the prime rib:Place the seasoned roast in a roasting pan and cook for 15 minutes per pound at 450°F (232°C). This will create a flavorful crust. After 15 minutes, reduce the oven temperature to 325°F (163°C) and continue cooking for another 15-20 minutes per pound, or until the internal temperature reaches 135°F (57°C) for medium-rare.
- Rest the roast:After cooking, let the roast rest for at least 15 minutes before carving. This allows the juices to redistribute, resulting in a more tender and flavorful roast.
Grilling
Grilling dry-aged prime rib provides a smoky flavor and beautiful grill marks.
- Prepare the grill:Preheat your grill to medium-high heat. You can use a gas grill or a charcoal grill. For charcoal grills, use a two-zone method, with one side hot and the other side cooler.
- Season the roast:Season the prime rib generously with salt, pepper, and any other desired herbs or spices. You can also use a dry rub for added flavor.
- Grill the prime rib:Place the roast on the hot side of the grill and sear for 5-7 minutes per side. This will create a delicious crust. After searing, move the roast to the cooler side of the grill and continue cooking for another 15-20 minutes per pound, or until the internal temperature reaches 135°F (57°C) for medium-rare.
- Rest the roast:After grilling, let the roast rest for at least 15 minutes before carving. This allows the juices to redistribute, resulting in a more tender and flavorful roast.
Smoking
Smoking dry-aged prime rib imparts a deep, smoky flavor that enhances the rich taste of the meat.
- Prepare the smoker:Preheat your smoker to 225°F (107°C) using your preferred wood chips or wood chunks. Some popular choices for smoking prime rib include hickory, oak, or applewood.
- Season the roast:Season the prime rib generously with salt, pepper, and any other desired herbs or spices. You can also use a dry rub for added flavor.
- Smoke the prime rib:Place the seasoned roast in the smoker and cook for 2-3 hours, or until the internal temperature reaches 135°F (57°C) for medium-rare. Maintain a consistent temperature throughout the smoking process.
- Rest the roast:After smoking, let the roast rest for at least 15 minutes before carving. This allows the juices to redistribute, resulting in a more tender and flavorful roast.
Resting the Roast
Resting the dry-aged prime rib after cooking is crucial for achieving optimal tenderness and flavor.
Resting allows the juices to redistribute throughout the meat, resulting in a more flavorful and juicy roast.
During cooking, the muscle fibers contract, trapping juices within the meat. As the roast rests, the muscle fibers relax, allowing the juices to flow back out and rehydrate the meat. This process ensures that the roast is not dry and retains its rich flavor.
Serving and Enjoying Dry-Aged Prime Rib
After all the effort you’ve put into selecting, preparing, and cooking your dry-aged prime rib, it’s time to enjoy the fruits of your labor! This succulent and flavorful cut of meat deserves to be paired with the perfect accompaniments to elevate the dining experience.
Ideal Accompaniments for Dry-Aged Prime Rib
The rich, intense flavor of dry-aged prime rib pairs beautifully with a variety of sides, sauces, and beverages.
Sides
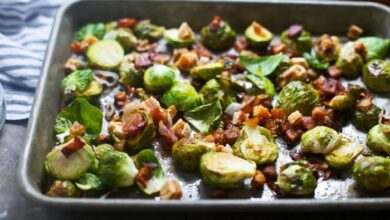
- Roasted Vegetables:The natural sweetness of roasted vegetables, such as carrots, potatoes, Brussels sprouts, and asparagus, complements the savory notes of the prime rib.
- Creamy Mashed Potatoes:The creamy texture of mashed potatoes provides a luxurious contrast to the rich, meaty flavor of the prime rib.
- Green Beans Almondine:The crispy, nutty flavor of almondine green beans adds a delightful textural element and complements the richness of the prime rib.
- Mac and Cheese:A classic comfort food that pairs well with the savory flavors of dry-aged prime rib.
- Mushroom Risotto:The earthy flavor of mushroom risotto provides a sophisticated accompaniment to the prime rib.
Sauces
- Au Jus:A classic sauce made from the drippings of the prime rib, au jus adds a rich and savory flavor.
- Horseradish Cream Sauce:The tangy and spicy flavor of horseradish cream sauce cuts through the richness of the prime rib.
- Red Wine Reduction:A rich and flavorful sauce made from red wine, herbs, and spices.
- Béarnaise Sauce:A classic French sauce made with egg yolks, butter, and tarragon, béarnaise sauce adds a touch of elegance to the prime rib.
- Peppercorn Sauce:A flavorful sauce made with cracked peppercorns, herbs, and butter.
Beverages
- Red Wine:A full-bodied red wine, such as Cabernet Sauvignon or Merlot, pairs well with the rich flavor of dry-aged prime rib.
- Beer:A dark beer, such as a stout or porter, can complement the savory flavors of the prime rib.
- Whiskey:A smooth whiskey, such as bourbon or rye, can be enjoyed neat or on the rocks as a digestif.
Cuts of Prime Rib and Recommended Cooking Methods
The cut of prime rib you choose will determine the best cooking method for achieving optimal results.
| Cut of Prime Rib | Recommended Cooking Method |
|---|---|
| Standing Rib Roast | Roasting |
| Rib Eye Roast | Roasting or Grilling |
| Bone-In Ribeye | Grilling or Pan-Searing |
Carving and Serving Dry-Aged Prime Rib, Dry aged prime rib
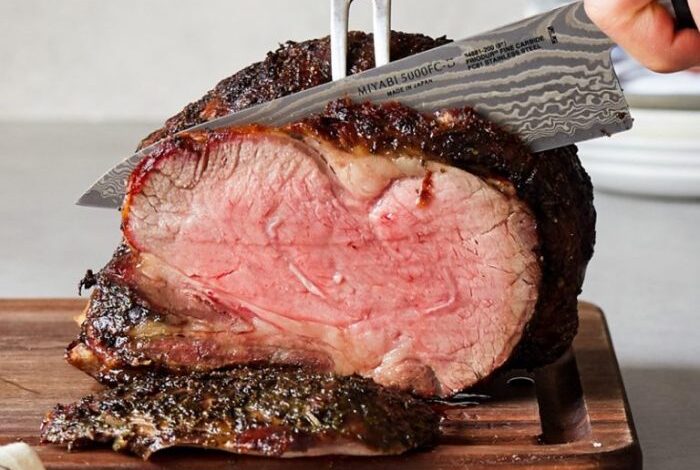
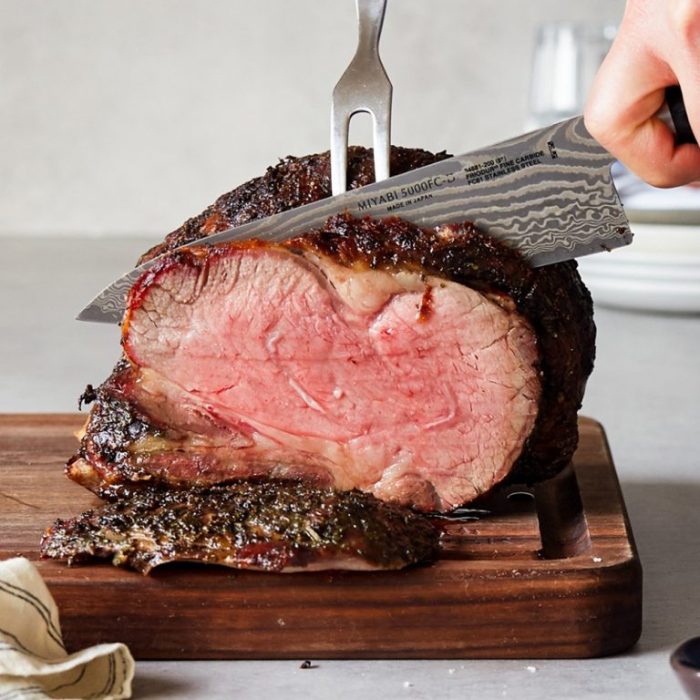
Carving a dry-aged prime rib requires a steady hand and a sharp knife.
- Use a sharp carving knife:A sharp knife will make carving easier and ensure clean cuts.
- Carve against the grain:Carving against the grain will result in tender and juicy slices.
- Slice the roast into thin pieces:Thin slices will ensure that each piece is cooked to perfection and will melt in your mouth.
- Serve the prime rib on a platter:Arrange the carved slices on a platter and garnish with fresh herbs and vegetables.
Dry-Aged Prime Rib at Home
The allure of dry-aged prime rib is undeniable, but the idea of aging it yourself at home might seem daunting. While it’s not as straightforward as a trip to the butcher, with the right knowledge and equipment, it’s achievable. Dry-aging at home allows you to control the process and achieve a truly unique flavor profile.
Setting Up a Home Dry-Aging Environment
Creating the ideal dry-aging environment at home involves a combination of factors, including temperature, humidity, and airflow. The goal is to mimic the conditions found in commercial dry-aging facilities.
- Temperature:The ideal temperature range for dry-aging is between 34°F and 38°F (1°C and 3°C). This temperature range inhibits bacterial growth while allowing for proper enzymatic breakdown and moisture evaporation.
- Humidity:Humidity levels should be maintained between 70% and 80%. This helps prevent excessive drying and ensures the meat retains moisture.
- Airflow:Proper airflow is crucial for removing moisture and preventing mold growth. A small fan can be used to create a gentle breeze.
Home Dry-Aging Equipment
Several options exist for creating a dry-aging environment at home, ranging from DIY solutions to specialized appliances.
- Refrigerator:A dedicated refrigerator can be used for dry-aging, but it requires modifications to control temperature and humidity. You can use a temperature controller to regulate the temperature, and a humidity tray filled with water to maintain moisture levels.
- Dry-Aging Chamber:Specialized dry-aging chambers are designed specifically for this purpose and offer precise temperature and humidity control. These chambers often feature built-in fans for optimal airflow.
- DIY Solutions:For a budget-friendly approach, you can create a makeshift dry-aging chamber using a cooler or a large plastic container. However, it’s important to ensure proper temperature and humidity control in these setups.
Safety Tips for Handling and Storing Dry-Aged Meat
Dry-aged meat is susceptible to bacterial growth, so proper handling and storage are essential.
- Cleanliness:Maintain a clean and sanitized environment for handling and storing dry-aged meat. Wash your hands thoroughly before and after handling the meat.
- Storage:Store dry-aged meat in a dedicated space, separate from other foods. Use a butcher paper or cheesecloth to wrap the meat, allowing for airflow while preventing moisture buildup.
- Monitoring:Regularly check the meat for signs of spoilage, such as discoloration, slimy texture, or unpleasant odor. If you notice any of these signs, discard the meat immediately.

