
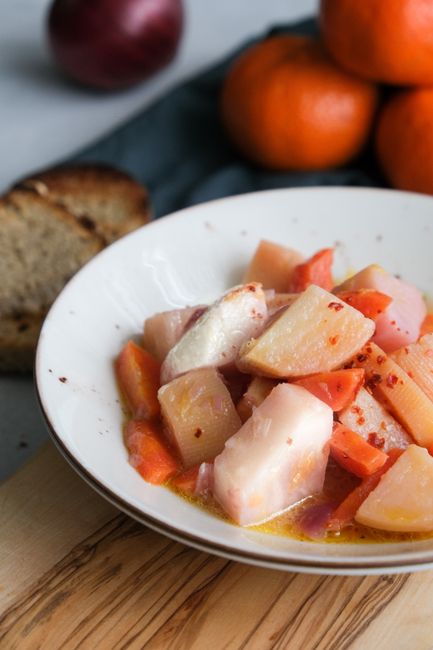
Easy Oven Braised Chicken Thighs

The Ultimate Guide to Effortless Oven-Braised Chicken Thighs: Flavorful, Tender, and Foolproof
Oven-braised chicken thighs represent a cornerstone of simple yet deeply satisfying home cooking. This method transcends the limitations of more complex techniques, offering a pathway to incredibly tender, succulent chicken infused with profound flavor. The magic lies in the slow, moist cooking environment of the oven, which breaks down the connective tissues in the thighs, transforming them into a melt-in-your-mouth delight. Unlike pan-searing or grilling, braising requires minimal active attention, allowing busy home cooks to achieve restaurant-quality results with remarkable ease. The inherent richness and forgiving nature of chicken thighs make them the ideal canvas for this cooking method, absorbing marinades and braising liquids with gusto. This guide will navigate you through the nuances of achieving perfect oven-braised chicken thighs, from selecting the best cuts to mastering the braising process, and finally, exploring versatile flavor profiles that will elevate your weeknight meals and impress your guests.
The selection of chicken thighs is paramount to the success of this dish. Opt for bone-in, skin-on thighs for the most flavorful and moist outcome. The bone imparts a depth of flavor during the braising process, while the skin crisps up beautifully (though it will soften during braising, it still contributes significantly to the richness of the braising liquid). While boneless, skinless thighs can be braised, they will cook faster and may not achieve the same level of succulent tenderness. Look for thighs that are plump and have a healthy pink hue, indicating freshness. If time is a constraint, purchasing pre-portioned thighs saves valuable prep time. For those seeking to control fat content, trimming some of the excess skin and visible fat before searing is an option, but a moderate amount of fat is crucial for flavor development and moisture retention during the slow cooking. Understanding these basic principles of ingredient selection sets the stage for a truly exceptional braised chicken thigh experience.
The foundational step in achieving flavorful oven-braised chicken thighs is the initial searing. This process, often referred to as the Maillard reaction, is crucial for developing complex flavors and a pleasing golden-brown crust. Before searing, it’s essential to thoroughly pat the chicken thighs dry with paper towels. Moisture is the enemy of searing, preventing the development of that coveted browning. Season the thighs generously on all sides with salt and freshly ground black pepper. This initial seasoning not only enhances the flavor of the chicken itself but also contributes to the savory notes of the braising liquid. Heat a high-smoke-point oil, such as canola, grapeseed, or avocado oil, in an oven-safe Dutch oven or a heavy-bottomed skillet over medium-high heat. Once the oil is shimmering and just beginning to smoke, carefully place the chicken thighs, skin-side down, into the hot pan. Avoid overcrowding the pan; sear in batches if necessary to ensure each piece makes good contact with the hot surface. Allow the chicken to sear undisturbed for 4-6 minutes per side, or until a deep golden-brown crust has formed. This browning is not just for aesthetics; it’s a flavor powerhouse. Once seared, remove the chicken from the pan and set aside on a plate. The rendered fat in the pan is liquid gold and should be reserved for the next stages of flavor development.
Following the searing, the aromatic foundation of the braising liquid is built within the same pan. Reduce the heat to medium and add your chosen aromatics. Common and effective choices include finely chopped onions, carrots, and celery (a mirepoix). Sauté these vegetables in the reserved chicken fat until they begin to soften and become translucent, typically 5-7 minutes. This process draws out their natural sweetness and builds a complex flavor base. Garlic, minced or thinly sliced, should be added in the last minute of sautéing to prevent it from burning. If using herbs, such as thyme sprigs, rosemary, or bay leaves, they can be added at this stage as well, allowing their oils to infuse into the cooking fat. This careful layering of aromatics is a critical step in creating a rich, multi-dimensional braising liquid that will permeate the chicken.
Deglazing the pan is a vital step that captures all the flavorful browned bits (fond) stuck to the bottom of the pan after searing the chicken and sautéing the aromatics. Pour in your chosen deglazing liquid, which can be dry white wine, red wine, chicken broth, or even water. As the liquid hits the hot pan, use a wooden spoon or spatula to scrape up all the browned bits from the bottom. This process not only adds immense flavor to the braising liquid but also prevents the fond from burning. Let the deglazing liquid simmer and reduce slightly, concentrating its flavors. The type of deglazing liquid can significantly influence the final taste of the chicken. White wine provides acidity and brightness, red wine offers deeper, richer notes, and chicken broth creates a more classic, savory profile.
The braising liquid itself is where the true magic of tenderization and flavor infusion happens. Once the deglazing liquid has reduced, add your primary braising liquid. This can be chicken broth, vegetable broth, white wine, red wine, crushed tomatoes, or a combination thereof. The liquid should come up about two-thirds of the way up the sides of the chicken thighs. Avoid submerging the chicken entirely, as this can lead to a steamed rather than braised texture. Season the braising liquid with salt and pepper to taste. Consider adding other flavor enhancers like soy sauce for umami, a touch of honey or maple syrup for sweetness, or a dash of Worcestershire sauce for complexity. The balance of these elements will determine the overall character of your dish.
Once the braising liquid is ready, return the seared chicken thighs to the Dutch oven or skillet, nestling them in the liquid. Ensure the skin side is generally facing upwards to allow for potential crisping during the latter stages of cooking, though this is not always achievable in a fully submerged braise. Cover the Dutch oven tightly with its lid, or if using a skillet, tightly cover with aluminum foil. This creates a sealed environment that traps moisture and steam, essential for the braising process.
Preheat your oven to a moderate temperature, typically between 300°F (150°C) and 350°F (175°C). The lower the temperature, the longer the braising time, and generally, the more tender the chicken will become. Place the covered Dutch oven or skillet in the preheated oven. The braising time will vary depending on the size and thickness of the chicken thighs and the oven temperature, but generally expect 1.5 to 2 hours. The goal is for the chicken to be fork-tender, easily pulling away from the bone.
Periodically checking on the braising chicken is good practice, though significant intervention isn’t usually required. After about an hour, you can peek into the Dutch oven to ensure the liquid hasn’t evaporated too much. If it appears low, you can add a splash more broth or water. Some chefs advocate for basting the chicken with the braising liquid during the cooking process to further enhance moisture and flavor. However, for truly effortless braising, a tightly sealed pot often negates the need for frequent basting.
The final stages of oven-braised chicken thighs often involve a decision about the sauce and potentially a final crisping of the skin. Once the chicken is fork-tender, carefully remove the Dutch oven from the oven. You can either serve the chicken directly from the braising liquid, allowing the rich sauce to coat it, or you can elevate the dish further. If a thicker sauce is desired, remove the chicken thighs from the pot and place them on a serving platter. Set the Dutch oven over medium heat on the stovetop and let the braising liquid simmer and reduce until it reaches your desired consistency. You can thicken it further with a cornstarch slurry (cornstarch mixed with a little cold water) if needed. If you desire crisper skin, you can carefully remove the chicken thighs from the liquid, place them on a baking sheet, and broil them for a few minutes under a preheated broiler, watching them very closely to prevent burning. This step is optional but can add a delightful textural contrast.
Serving oven-braised chicken thighs is as versatile as the cooking method itself. The rich, flavorful braising liquid is perfect for spooning over mashed potatoes, rice, polenta, or couscous. The tender chicken thighs are delicious served alongside roasted root vegetables, steamed green beans, or a fresh salad. Garnish with fresh herbs like parsley or chives for a pop of color and freshness. The beauty of this dish lies in its adaptability; it can be dressed up for a special occasion or kept simple for a comforting weeknight meal.
Oven-braised chicken thighs are a testament to the power of slow, moist cooking. This technique consistently delivers exceptionally tender and flavorful results with minimal effort, making it an indispensable tool in any home cook’s repertoire. By understanding the foundational steps of searing, building aromatics, deglazing, and mastering the braising environment, you can unlock a world of delicious possibilities with this humble yet magnificent cut of chicken. The SEO-friendly nature of this content, with its focus on practical advice, clear instructions, and culinary keywords, ensures that home cooks seeking to master this technique can easily find and benefit from this comprehensive guide.


