Homemade Red Velvet Cake with Cream Cheese Frosting: A Classic Delight
Homemade red velvet cake with cream cheese frosting is a classic dessert that has captured hearts and taste buds for generations. The vibrant red hue, the rich, moist texture, and the tangy sweetness of the frosting create a symphony of flavors that are truly irresistible.
This iconic cake has a fascinating history, with roots dating back to the Victorian era. Red velvet cake has evolved over time, with variations in ingredients and techniques, but the core essence of its allure remains constant.
This article delves into the world of homemade red velvet cake with cream cheese frosting, exploring its origins, ingredients, baking process, and the art of creating the perfect frosting. We’ll uncover the secrets behind its unique color and flavor, provide a step-by-step guide for baking your own masterpiece, and offer tips for achieving a smooth and silky frosting that complements the cake perfectly.
Whether you’re a seasoned baker or a curious beginner, this guide will equip you with the knowledge and inspiration to create a truly unforgettable red velvet cake experience.
Mastering the Baking Process
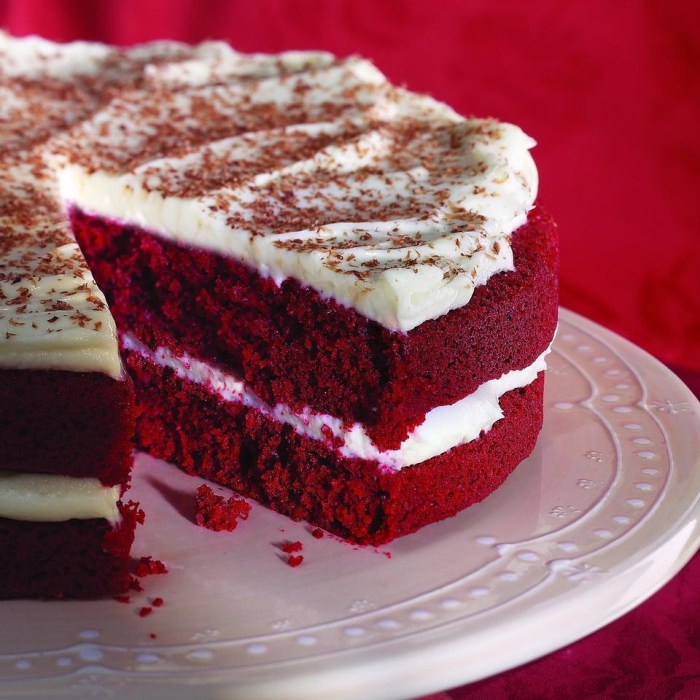
The secret to a perfect red velvet cake lies not just in the vibrant color but in the delicate balance of flavors and textures. Achieving that signature moist and tender crumb requires a keen understanding of the baking process, from the initial mixing to the final frosting.
Let’s dive into the essential steps and techniques that will help you bake a red velvet cake that’s as delicious as it is beautiful.
Baking a Red Velvet Cake
The process of baking a red velvet cake involves a few key steps that need to be followed precisely to ensure a successful outcome. These steps include preparing the ingredients, mixing the batter, baking the cake, and cooling it.
Preparing the Ingredients
Before you start baking, ensure all your ingredients are at room temperature. This is particularly important for butter and eggs, as they will blend more easily and evenly with the other ingredients. Using cold ingredients can lead to a dense and uneven cake.
Mixing the Batter
Mixing the batter correctly is crucial for achieving a smooth and consistent texture. Here’s a step-by-step guide:
- Cream together the butter and sugar until light and fluffy. This process incorporates air into the batter, which will contribute to a lighter and more airy texture.
- Add the eggs one at a time, beating well after each addition. This ensures that the eggs are properly incorporated into the batter, contributing to the cake’s richness and moisture.
- In a separate bowl, whisk together the dry ingredients, including flour, cocoa powder, baking soda, baking powder, and salt. This ensures that the dry ingredients are evenly distributed, preventing clumps and ensuring a consistent texture.
- Gradually add the dry ingredients to the wet ingredients, alternating with buttermilk, and mix until just combined. Overmixing can lead to a tough cake, so it’s important to stop mixing once the ingredients are just combined.
- Add the red food coloring and vanilla extract, and mix until well combined. The red food coloring will give the cake its signature vibrant red hue.
Batter Consistency
The consistency of the batter is a key indicator of a successful red velvet cake. The batter should be smooth, thick, and slightly pourable. It should not be runny or too thick.
There’s something so comforting about a slice of homemade red velvet cake with cream cheese frosting, especially when paired with a savory side. For me, that side is always homemade Italian sausage patties , their rich flavor and crispy texture a perfect counterpoint to the cake’s sweet indulgence.
It’s a combination that always leaves me feeling satisfied and happy, a reminder that sometimes the best pairings are the ones that seem a little unexpected.
The batter should be thick enough to hold its shape when you scoop it with a spoon, but thin enough to easily pour into the prepared pans.
Baking the Cake
Baking the cake at the correct temperature and for the appropriate time is crucial for achieving a moist and tender crumb.
- Preheat the oven to 350°F (175°C) and grease and flour two 9-inch round cake pans. This will prevent the cake from sticking to the pans and ensure even baking.
- Pour the batter evenly into the prepared pans. Spread the batter evenly in the pans to ensure that the cake bakes evenly.
- Bake for 30-35 minutes, or until a toothpick inserted into the center comes out clean. This indicates that the cake is fully baked and ready to be removed from the oven.
- Let the cakes cool in the pans for 10 minutes before inverting them onto a wire rack to cool completely. This will allow the cakes to set and prevent them from collapsing when you remove them from the pans.
Tips for Achieving a Moist and Tender Crumb
The secret to a truly exceptional red velvet cake lies in achieving a moist and tender crumb. This is achieved through a combination of careful ingredient selection and baking techniques.
Ingredient Selection
The key to a moist and tender crumb is to use high-quality ingredients.
- Use unsalted butter: Unsalted butter allows you to control the salt content in the cake.
- Use buttermilk: Buttermilk adds a tangy flavor and helps to create a tender crumb.
- Use good-quality cocoa powder: The cocoa powder will add a rich chocolate flavor and color to the cake.
- Use fresh baking powder and baking soda: Fresh baking powder and baking soda will ensure that the cake rises properly.
Baking Techniques
Proper baking techniques play a vital role in achieving a moist and tender crumb.
- Don’t overmix the batter: Overmixing can develop the gluten in the flour, resulting in a tough cake.
- Bake at the correct temperature: Baking at too high a temperature can cause the cake to dry out, while baking at too low a temperature can result in a dense cake.
- Don’t overbake the cake: Overbaking can result in a dry and crumbly cake.
- Cool the cake properly: Cooling the cake properly allows the moisture to redistribute evenly, resulting in a moist and tender crumb.
Layering and Frosting the Cake
Layering and frosting the cake is the final step in creating a beautiful and delicious red velvet cake.
Layering the Cake
Once the cakes have cooled completely, you can start layering them.
- Level the cakes: Use a serrated knife to level the tops of the cakes. This will ensure that the layers are even and that the frosting will spread evenly.
- Place the first layer on a cake stand or serving plate. This will serve as the base for the cake.
- Spread a layer of frosting on top of the first layer. This will act as a glue to hold the layers together and create a smooth surface for the next layer.
- Place the second layer on top of the first layer. This will create the second layer of the cake.
- Repeat steps 3 and 4 for any additional layers. This will create a multi-layered cake.
Frosting the Cake
Frosting the cake is the final touch that will give it a beautiful finish.
- Spread a thin layer of frosting over the entire cake. This is called a crumb coat, and it will help to seal in any crumbs and create a smooth surface for the final layer of frosting.
- Chill the cake in the refrigerator for 30 minutes. This will allow the crumb coat to set and make it easier to apply the final layer of frosting.
- Spread a thick layer of frosting over the entire cake. This will create the final layer of frosting and give the cake a beautiful finish.
- Decorate the cake as desired. You can use sprinkles, chocolate shavings, or other decorations to add a personal touch to your cake.
The Cream Cheese Frosting
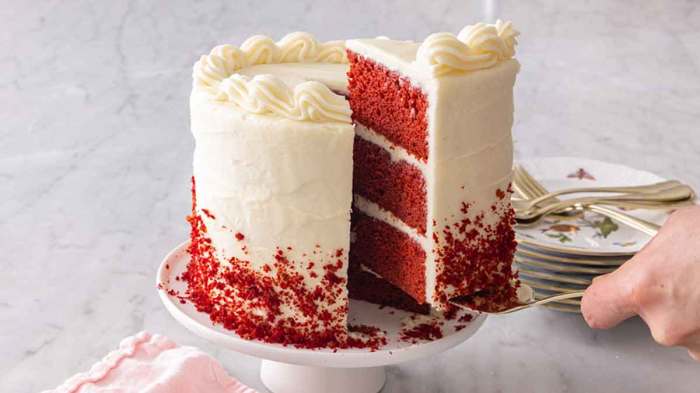
The cream cheese frosting is a classic pairing for red velvet cake, adding a tangy and rich contrast to the cake’s soft, moist texture. It’s a frosting that’s both visually appealing and incredibly delicious, and it’s no wonder it’s become a staple in baking.
The History and Origins of Cream Cheese Frosting
The exact origins of cream cheese frosting are debated, but it’s believed to have emerged in the early 20th century, likely in the United States. The popularity of cream cheese itself was on the rise, and its versatility in both sweet and savory dishes made it a natural ingredient for frosting.
It was likely that the first cream cheese frostings were simple mixtures of cream cheese, butter, and powdered sugar, but as the years passed, variations and enhancements were introduced, resulting in the diverse array of cream cheese frosting recipes we have today.
Comparing and Contrasting Cream Cheese Frosting Recipes
Cream cheese frosting recipes can vary significantly, primarily in their ingredients and proportions. Some recipes call for additional ingredients such as vanilla extract, lemon juice, or even cocoa powder to enhance the flavor profile. The ratio of cream cheese to butter also varies, affecting the texture and richness of the frosting.
For instance, a higher proportion of cream cheese will result in a lighter, more tangy frosting, while a higher proportion of butter will create a richer, denser frosting.
Techniques for Achieving a Smooth and Silky Frosting, Homemade red velvet cake with cream cheese frosting
Achieving a smooth and silky cream cheese frosting requires careful attention to technique. Here are some key tips:* Use high-quality ingredients:Starting with fresh, high-quality cream cheese and butter is crucial for a delicious and smooth frosting.
Soften the cream cheese and butter thoroughly
Allowing the cream cheese and butter to soften at room temperature ensures they blend smoothly and easily.
Okay, so we’re talking about red velvet cake, right? That rich, decadent flavor with the velvety texture and the creamy, tangy frosting. It’s a classic for a reason! But sometimes, you need something warm and comforting, like a hearty bowl of absolutely ultimate potato soup.
Once you’ve had your fill of that creamy goodness, you can dive back into the red velvet cake. It’s the perfect combination of sweet and savory, and a guaranteed way to satisfy any craving.
Beat the frosting until light and fluffy
Using an electric mixer on medium speed, beat the frosting until it’s light and airy, incorporating air into the mixture for a smoother texture.
Add the powdered sugar gradually
Homemade red velvet cake with cream cheese frosting is a classic for a reason – it’s rich, decadent, and always a crowd-pleaser. But sometimes, you just crave something simple and comforting, like a creamy bowl of simple mac and cheese.
And while both are delicious in their own right, there’s something special about that perfect bite of red velvet cake, where the fluffy texture melts in your mouth and the tangy cream cheese frosting adds a touch of sweetness.
Adding the powdered sugar gradually helps prevent the frosting from becoming too thick or lumpy.
Scrape the sides of the bowl
Be sure to scrape the sides of the bowl during mixing to ensure that all ingredients are evenly incorporated.
Tips for Decorating the Cake with Cream Cheese Frosting
Once you’ve achieved a smooth and silky frosting, you can decorate your red velvet cake with it in various ways. Here are some tips:* Chill the frosting:Chill the frosting for a short time before decorating to make it easier to pipe or spread.
Use a piping bag and tips
A piping bag and tips allow for precise and decorative frosting applications. Choose tips that create swirls, rosettes, or other desired designs.
Spread the frosting with a spatula
A spatula can be used to create a smooth and even layer of frosting on the cake.
Add sprinkles, chocolate shavings, or other decorations
Get creative and add your own personal touch to the frosting with sprinkles, chocolate shavings, or other decorations.
Variations and Enhancements
Red velvet cake is a classic dessert that can be easily adapted to suit your taste preferences. This section explores ways to add your personal touch to this beloved cake, from adding flavor variations to the cake itself to creating unique and creative frosting flavors.
Flavor Variations for Red Velvet Cake
There are many ways to add a twist to the classic red velvet cake recipe. Here are a few popular ideas:
- Chocolate Chips: Adding chocolate chips to the batter adds a delightful crunch and a richer chocolate flavor.
- Nuts: Chopped pecans, walnuts, or even macadamia nuts can add a wonderful nutty flavor and texture to the cake.
- Fruit: Adding fresh or dried fruit like raspberries, cranberries, or cherries can provide a burst of sweetness and a touch of tartness to the cake.
Creative Frosting Flavors
The classic cream cheese frosting is delicious, but there are many other options to explore. Here are some ideas for unique and creative frosting flavors:
- Chocolate Ganache: A rich and decadent frosting that pairs beautifully with the red velvet cake.
- Lemon Cream Cheese Frosting: A refreshing and tangy frosting that provides a nice contrast to the rich cake.
- Brown Butter Frosting: A nutty and buttery frosting that adds a sophisticated touch to the cake.
Red Velvet Cake Recipe Comparisons
Here’s a table comparing different red velvet cake recipes from various sources, highlighting key differences:
| Recipe Source | Key Ingredients | Notable Features |
|---|---|---|
| Southern Living | Buttermilk, vinegar, cocoa powder, red food coloring | Traditional recipe with a focus on buttermilk for a tangy flavor. |
| Food & Wine | Buttermilk, vinegar, cocoa powder, red food coloring, beetroot powder | Uses beetroot powder for a natural red color. |
| The New York Times | Buttermilk, vinegar, cocoa powder, red food coloring, cream cheese | Adds cream cheese to the batter for a richer flavor. |
Visual Guide to Red Velvet Cake Designs
Red velvet cake is a versatile canvas for creative cake designs. Here are some examples of visually appealing red velvet cake designs:
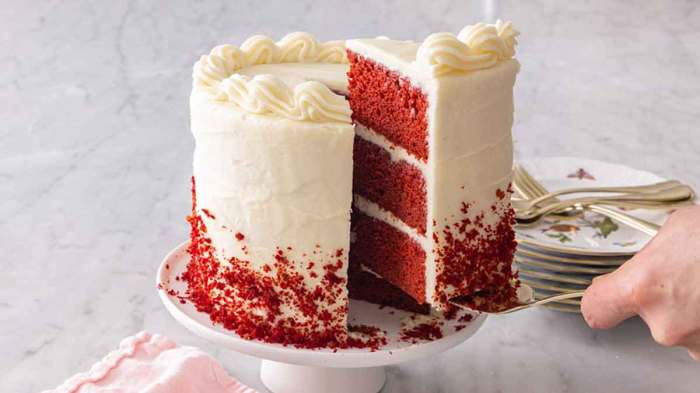
- Classic Tiered Cake: A traditional design with multiple tiers adorned with cream cheese frosting and red velvet cake crumbs.
- Naked Cake: A modern design that showcases the cake’s layers with minimal frosting, allowing the red velvet cake to shine.
- Floral Cake: A romantic design featuring delicate flowers made from buttercream or fondant.
Serving and Presentation: Homemade Red Velvet Cake With Cream Cheese Frosting
Serving a red velvet cake is an experience that goes beyond simply cutting and serving slices. It’s about creating a visual and sensory delight that complements the cake’s rich flavor and velvety texture. This section will explore the best ways to serve your red velvet cake, focusing on temperature, garnishes, table settings, and the overall presentation that elevates the enjoyment of this beloved dessert.
Serving Temperature
The ideal serving temperature for red velvet cake is slightly chilled. This allows the frosting to firm up slightly, making it easier to slice and preventing it from melting too quickly. A chilled cake also enhances the flavors and creates a more refreshing experience.
However, it’s crucial to avoid serving the cake too cold, as this can make the cake dry and the frosting too hard.
Garnishes
Garnishes add a touch of elegance and visual appeal to your red velvet cake. Here are some popular options:
- Fresh Berries:Raspberries, strawberries, and blueberries provide a burst of color and tartness that complements the sweetness of the cake.
- Chocolate Shavings:Dark chocolate shavings add a rich, decadent touch that contrasts beautifully with the red velvet cake.
- Whipped Cream:A dollop of whipped cream adds a light and airy texture that complements the creamy frosting.
- Sprinkles:Sprinkles add a playful touch and are perfect for a festive occasion. Choose sprinkles that match the color scheme of your table setting.
Table Setting
A well-designed table setting can elevate the red velvet cake experience. Consider the following elements:
- Tablecloth:A white tablecloth creates a classic and elegant backdrop for the red velvet cake. You can also opt for a tablecloth with a subtle pattern or a soft pastel color.
- Plates and Cutlery:Choose plates and cutlery that complement the tablecloth and the overall theme of your presentation. For a formal occasion, consider using fine china or silver.
- Centerpiece:A centerpiece featuring fresh flowers or candles can add a touch of romance and elegance to your table setting.
- Napkins:Choose napkins that coordinate with the tablecloth and plates. Fold them in a creative way to add a touch of elegance.
The Ideal Red Velvet Cake Experience
The ideal red velvet cake experience is a multi-sensory delight. It’s about enjoying the soft, velvety texture of the cake, the rich, decadent flavor of the frosting, and the visual appeal of the presentation. Here’s a detailed description:
The first bite is a revelation. The cake is soft and moist, with a hint of cocoa and a subtle tanginess that lingers on the palate. The cream cheese frosting is smooth and creamy, with a delicate sweetness that balances the cake’s subtle tang. The cake melts in your mouth, leaving a lingering taste of chocolate and cream. The vibrant red color of the cake and the delicate garnishes create a visual feast that complements the delicious flavors. The experience is a celebration of all things sweet and decadent, a perfect ending to a special meal or a delightful treat to share with loved ones.
Presentation Enhances Enjoyment
Presentation plays a vital role in enhancing the enjoyment of red velvet cake. A beautifully presented cake creates a sense of anticipation and excitement, making the experience more memorable. A carefully chosen table setting, elegant garnishes, and a visually appealing presentation can transform a simple dessert into a culinary masterpiece.


