No Fail Pie Crust III: Mastering the Perfect Crust
No Fail Pie Crust III is more than just a recipe; it’s a promise of deliciousness and a sigh of relief for anyone who’s ever struggled with a tough, crumbly, or soggy pie crust. This recipe, honed over time, is designed to deliver consistent results, leaving you with a flaky, golden-brown crust that’s perfect for any filling.
The secret lies in a careful combination of ingredients and techniques, each playing a crucial role in achieving the desired texture. From the cold butter to the gentle handling, every step is designed to create a crust that’s both flavorful and visually appealing.
This recipe isn’t just about achieving a successful pie crust; it’s about mastering the art of baking, ensuring that your pies are as beautiful as they are delicious.
The “No Fail” Pie Crust Concept
There’s a reason why “no fail” pie crust recipes are so popular. They promise a perfect, flaky crust every time, even for those who might not consider themselves baking experts. The appeal lies in their simplicity and reliability, offering a solution to the common frustrations many encounter when making traditional pie crusts.
Traditional pie crust recipes often involve precise measurements, careful handling, and a bit of culinary intuition. They can be notoriously fickle, leading to tough, soggy, or crumbly results. “No fail” recipes, on the other hand, are designed to be more forgiving, using ingredients and techniques that minimize the risk of common pitfalls.
Ingredients and Techniques for Success
These recipes often emphasize the use of cold ingredients, including butter, water, and flour. This is crucial for achieving a flaky texture. Cold butter helps prevent the gluten in flour from developing too much, which can lead to a tough crust.
Additionally, “no fail” recipes often incorporate a combination of shortening and butter, further enhancing flakiness.
Tips and Tricks for Achieving the Best Results
Here are some additional tips for ensuring success with a “no fail” pie crust:
- Use a pastry blender or two forks to cut the butter into the flour until it resembles coarse crumbs. This ensures even distribution of butter throughout the dough, contributing to a flaky texture.
- Avoid overworking the dough. Overmixing can lead to a tough crust. Once the ingredients are combined, gently form the dough into a disc and refrigerate for at least 30 minutes before rolling it out.
- Chill the pie crust before baking. This helps prevent shrinkage and ensures a crisp crust.
- Bake the pie crust for a few minutes before adding the filling. This helps to prevent a soggy bottom crust.
Ingredients and Their Roles
The key to a successful pie crust lies in understanding the role of each ingredient and how they interact to create the perfect texture and flavor. Choosing high-quality ingredients is essential, especially when it comes to the butter and flour.
Okay, so you’re ready to conquer that no-fail pie crust, right? But maybe you need a little break from all that pastry-making. I’ve got you covered! Check out these easy cheesy hot dog crescent rolls for a fun, cheesy snack that’s perfect for a quick bite.
Then, you’ll be back to your pie crust with renewed energy and ready to tackle those perfect golden edges!
Flour’s Role in Pie Crust
Flour is the foundation of the pie crust, providing structure and texture. Different types of flour have varying gluten content, which affects the crust’s chewiness and tenderness. For a flaky and tender crust, all-purpose flour is a good choice. It has a moderate gluten content, resulting in a crust that holds its shape while still being pleasantly crisp.
Butter’s Role in Pie Crust
Butter is the star of the show, contributing to the flakiness and rich flavor of the pie crust. Cold butter is crucial for creating layers within the dough. As the butter melts during baking, it creates pockets of steam, causing the dough to separate and become flaky.
The type of butter also impacts the flavor. Unsalted butter allows you to control the salt level in the crust, resulting in a more balanced taste.
The Role of Other Ingredients, No fail pie crust iii
- Saltenhances the flavors of the other ingredients, creating a more balanced taste.
- Ice Wateris used to hydrate the flour and gluten, forming the dough. Cold water helps keep the butter cold, preventing it from melting prematurely and hindering flakiness.
- Sugaradds a touch of sweetness and helps to brown the crust during baking.
Using High-Quality Ingredients
The quality of the ingredients significantly impacts the final outcome. Using high-quality butter, like European-style butter with a higher fat content, results in a richer flavor and more flakiness. Choosing a good quality all-purpose flour ensures a balanced gluten content, leading to a crust that is both sturdy and tender.
Mixing and Chilling Techniques
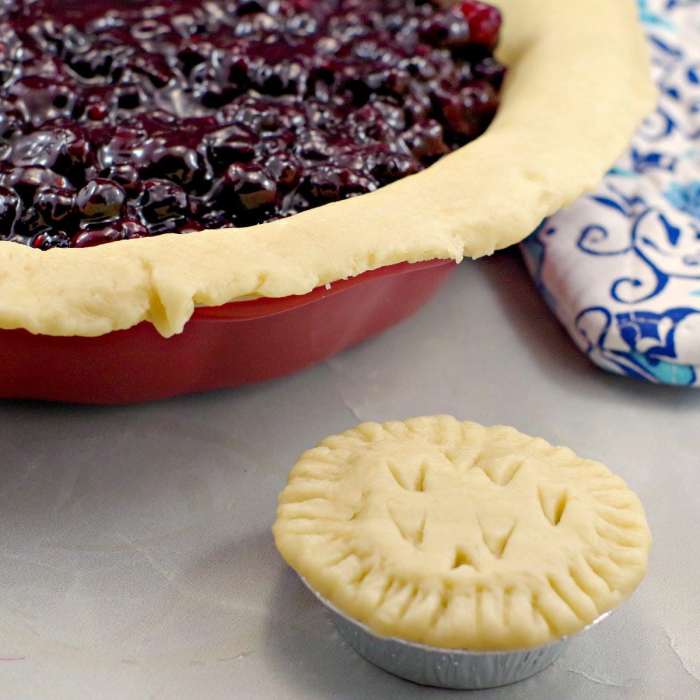
The key to a flaky and tender pie crust lies in the careful mixing and chilling of the ingredients. This ensures that the butter remains cold and forms small pockets of air, creating the signature flakiness.
My no-fail pie crust recipe III is all about simplicity and foolproof results, but sometimes I crave a little something extra to complement the sweet or savory fillings. That’s where a side dish like cream corn like no other comes in.
It’s a perfect balance of creamy and sweet, and the fresh corn flavor adds a delightful touch to any meal. Back to my pie crust, I’m always experimenting with different flavors and textures, and this latest version is a real winner.
Mixing the Ingredients
The goal of mixing is to distribute the butter evenly throughout the flour while maintaining its coldness. Overmixing can result in a tough crust, so we aim for a light and airy texture.
- Using a Pastry Blender:This classic method involves cutting the cold butter into small pieces and pressing them into the flour with a pastry blender. This technique creates a crumbly mixture with visible butter pieces. The goal is to achieve a mixture resembling coarse crumbs, with small pieces of butter still visible.
- Using a Food Processor:For faster and more consistent results, a food processor is an excellent option. Pulse the cold butter and flour together until the mixture resembles coarse crumbs. Over-processing can lead to a tough crust, so stop as soon as the desired consistency is reached.
Ensure that the butter is cut into small pieces before adding it to the food processor, and pulse in short bursts, checking the consistency after each pulse. This ensures that the butter remains cold and doesn’t melt too quickly.
Chilling the Dough
Chilling the dough is crucial for achieving a flaky pie crust. This allows the gluten to relax and the butter to solidify, preventing it from melting during baking.
- Importance of Chilling:When the dough is chilled, the butter solidifies, creating barriers within the dough. During baking, the heat melts the butter, causing the dough to puff up and create flaky layers. This process is facilitated by the chilling process, which ensures that the butter remains firm and doesn’t melt prematurely.
- Chilling Time:It is recommended to chill the dough for at least 30 minutes, or even longer for optimal results. If you have time, chilling the dough overnight can enhance the flakiness even further. This extended chilling time allows the gluten to relax and the butter to solidify completely.
Rolling and Shaping the Crust
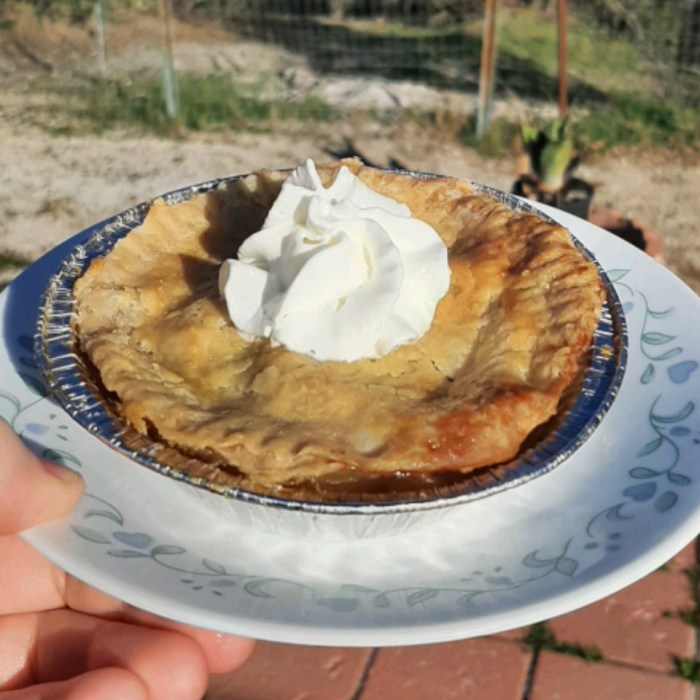
The moment of truth has arrived! You’ve meticulously mixed, chilled, and patiently waited for your pie crust dough to firm up. Now it’s time to unleash your inner pastry chef and transform that dough into a beautiful, flakey pie crust.This section will guide you through the art of rolling out the dough, transferring it to the pie plate, and creating decorative edges.
By following these steps, you’ll be well on your way to crafting a pie crust that’s as impressive as it is delicious.
Rolling Out the Dough
Rolling out the dough is a crucial step in pie crust making, as it determines the final shape and texture of your crust. The goal is to achieve a smooth, even layer of dough that fits perfectly into your pie plate.
Here’s a step-by-step guide to rolling out your pie crust:* Lightly Flour Your Surface:Spread a thin layer of flour on a clean, flat surface, such as a countertop or a pastry board. This prevents the dough from sticking and ensures a smooth rolling process.* Start with a Round Shape:Gently unwrap your chilled dough and place it in the center of the floured surface.
* Use a Rolling Pin:Using a rolling pin, gently roll the dough outward from the center, applying even pressure. The key is to roll the dough in all directions, ensuring it remains a consistent thickness.* Maintain Even Thickness:Aim for a thickness of about 1/8 inch (3 mm) for a standard pie crust.
You can use a ruler to check the thickness as you roll.* Avoid Over-Rolling:Be careful not to over-roll the dough, as this can make it tough and difficult to work with. If you find the dough becoming too sticky, simply add a little more flour to the surface.
I’m all about foolproof recipes, and my “No Fail Pie Crust III” is a testament to that! It’s so reliable, I even feel confident enough to tackle something a bit more complex like Colleen’s Slow Cooker Jambalaya. That recipe is a real crowd-pleaser, but I’m sticking to my pie crust for now – after all, a perfect crust is the foundation for any amazing pie!
Transferring the Dough to the Pie Plate
Once you’ve rolled out your dough to the desired thickness, it’s time to transfer it to the pie plate. This step requires a bit of finesse, as you want to avoid tearing the delicate dough.Here’s how to transfer the dough:* Gently Lift the Dough:Carefully lift the rolled-out dough and fold it in half, then in half again, forming a quadrant.
This makes it easier to handle and transfer.* Place in the Pie Plate:Unfold the dough and gently place it in the pie plate, ensuring it covers the bottom and sides.* Fit the Dough:Carefully press the dough into the bottom and sides of the pie plate, making sure it fits snugly.
You can use your fingers or a rolling pin to smooth out any creases or wrinkles.* Trim Excess Dough:Once the dough is fitted into the pie plate, use a sharp knife to trim any excess dough around the edges. Leave about a 1/2 inch overhang for the crust.
Creating Decorative Edges
Now comes the fun part – adding a decorative touch to your pie crust. There are numerous crimping techniques you can use to create beautiful and unique edges. Here are a few popular options:* Classic Crimp:This is a simple yet elegant crimping technique that involves pinching the dough between your thumb and forefinger, creating a series of evenly spaced ridges along the edge.* Fluted Edge:For a more decorative look, try using a fluted pastry wheel or a fork to create a series of even, wavy edges.* Lattice Top:If you’re feeling ambitious, try creating a lattice top for your pie.
This involves cutting strips of dough and weaving them together to create a beautiful, intricate design.* Decorative Cutouts:Use cookie cutters to create fun shapes and designs in the dough. These can be placed around the edge of the pie or on the top crust.
Remember, the key to creating beautiful edges is to be patient and consistent. Don’t be afraid to experiment with different techniques and find what works best for you.
Baking and Finishing Touches
Now that your pie crust is perfectly chilled and ready, it’s time to bake it into a golden masterpiece. Baking a pie crust requires careful attention to ensure a crisp, flaky, and flavorful result. This section will guide you through the process of baking your pie crust to perfection.
Pre-Baking Techniques
Pre-baking the pie crust, also known as blind baking, is crucial for preventing a soggy bottom. This technique involves baking the crust before adding the filling, allowing it to set and become sturdy enough to support the weight of the filling.
- Line the crust with parchment paper or foil:This prevents the crust from puffing up too much and helps to ensure an even bake. Press the parchment paper or foil into the crust, making sure it covers the entire surface and extends up the sides.
- Fill the crust with pie weights or dry beans:This step is essential for preventing the crust from shrinking and collapsing during baking.
You can use pie weights, which are specifically designed for this purpose, or dry beans, which are a readily available alternative. Distribute the weights evenly throughout the crust.
- Bake the crust for 10-15 minutes:This initial baking time allows the crust to set and become firm.
During this time, the crust should begin to turn golden brown around the edges.
- Remove the weights and bake for an additional 5-10 minutes:This step allows the crust to finish baking and become fully crisp. The crust should be a beautiful golden brown color and sound hollow when tapped.
Monitoring Crust Color and Texture
While the pie crust bakes, it’s essential to keep a close eye on its color and texture. This will help you determine when it’s reached the perfect level of doneness.
- Golden brown color:A golden brown crust indicates that the sugars in the flour have caramelized, adding a delicious flavor and a beautiful aesthetic.
- Crisp texture:A well-baked crust should be crisp and flaky, not soft or doughy. You can test the crust’s doneness by gently pressing on it with a finger.
If it springs back, it’s ready.
Achieving a Golden Brown and Flaky Crust
There are several techniques you can use to achieve a golden brown and flaky pie crust.
- Brush with milk or egg wash:This simple step adds a beautiful sheen to the crust and enhances its browning. Before baking, brush the crust with milk or a mixture of egg and water.
- Use a fork to create steam vents:This helps to prevent the crust from puffing up too much and ensures even baking.
Prick the bottom of the crust with a fork before baking.
- Bake at a high temperature:A high baking temperature promotes browning and crisping. Most pie crust recipes call for baking at 400°F (200°C) for the initial baking time.
Variations and Flavor Combinations
The beauty of a “no fail” pie crust lies in its versatility.
It serves as a blank canvas for an array of flavor combinations, both sweet and savory. By experimenting with spices, herbs, and even different flours, you can create unique and delicious pie crusts that complement any filling.
Spice and Herb Combinations
The addition of spices and herbs can infuse the pie crust with complex flavors and aromas. Here are some examples of spice and herb combinations that work well with different pie fillings:
| Filling | Spice/Herb Combination |
|---|---|
| Apple Pie | Cinnamon, nutmeg, allspice |
| Pumpkin Pie | Ginger, cinnamon, nutmeg, cloves |
| Berry Pie | Lemon zest, cardamom, vanilla |
| Chicken Pot Pie | Thyme, rosemary, sage |
| Quiche | Black pepper, paprika, garlic powder |
Sweet and Savory Fillings
The “no fail” pie crust is a perfect base for both sweet and savory fillings. Here are some examples of fillings that pair well with the crust:
Sweet Fillings
- Fruit pies: Apple, blueberry, cherry, peach, strawberry, rhubarb
- Cream pies: Pumpkin, pecan, banana cream, lemon meringue
- Chocolate pies: Chocolate cream, chocolate mousse, chocolate peanut butter
Savory Fillings
- Chicken pot pie: Chicken, vegetables, gravy
- Quiche: Eggs, cheese, vegetables, meats
- Shepherd’s pie: Ground meat, vegetables, mashed potatoes
- Savory tarts: Spinach and feta, mushroom and goat cheese, caramelized onion and bacon
Alternative Flours
While all-purpose flour is the standard for pie crusts, you can experiment with other flours for unique flavor and texture profiles.
Whole Wheat Flour
Whole wheat flour adds a nutty flavor and a slightly chewier texture to the crust. It’s a good choice for savory pies, as it complements the flavors of the filling.
Almond Flour
Almond flour creates a delicate and slightly sweet crust. It’s a great option for fruit pies, as it enhances the natural sweetness of the fruit.
“Remember to adjust the amount of liquid in the recipe when using alternative flours, as they absorb moisture differently than all-purpose flour.”
Storage and Serving: No Fail Pie Crust Iii
Having mastered the art of creating a flawless pie crust, it’s time to consider how to best preserve and enjoy your creation. Proper storage ensures your crust remains delicious and ready for use, while serving techniques highlight its delicate texture and enhance the overall pie experience.
Storing Leftover Pie Crust
Storing leftover pie crust correctly is crucial for maintaining its texture and flavor. Whether you have a pre-made crust or a leftover portion after baking, these methods will help preserve its quality.
- Refrigeration:Wrap the leftover pie crust tightly in plastic wrap or aluminum foil, ensuring no air pockets. Store it in the refrigerator for up to 3 days. The crust will remain pliable and ready for use in other recipes, such as hand pies or tarts.
- Freezing:For longer storage, freeze the pie crust. Wrap it tightly in plastic wrap, then place it in a freezer-safe bag, removing as much air as possible. Frozen pie crust can last for up to 3 months. Before using, thaw the crust in the refrigerator overnight or at room temperature for several hours.
Reheating the Crust
Reheating a pie crust can be tricky, as it can become soggy if not done properly. Here are some techniques to maintain its crispness and flavor:
- Oven:Preheat the oven to 350°F (175°C). Place the pie crust on a baking sheet and bake for 5-7 minutes, or until heated through and slightly crispy. This method works well for pre-baked crusts or leftover pie slices.
- Toaster Oven:For smaller portions, a toaster oven provides quick and even heating. Place the pie crust in the toaster oven and bake for 3-5 minutes, or until heated through. This method is ideal for individual slices.
- Microwave:While not the most ideal method, microwaving can be used for a quick reheating. Place the pie crust on a microwave-safe plate and heat for 10-15 seconds, or until warm. Be careful not to overcook, as this can make the crust rubbery.
Serving the Pie
Serving a pie is an art form, showcasing the delicious filling and the delicate crust. Here are some tips for serving a pie with flair:
- Presentation:Cut the pie into neat slices using a sharp knife. Arrange the slices on a serving platter or individual plates. For a rustic look, consider using a pie server to lift the slices.
- Accompaniments:Consider serving the pie with complementary sauces or toppings. Whipped cream, vanilla ice cream, or a drizzle of caramel sauce can enhance the flavor and add a touch of elegance.
- Temperature:Serve the pie at room temperature for optimal enjoyment. Allow the pie to sit for 15-20 minutes before serving, allowing the flavors to meld.

