Insane Oven Beef Ribs
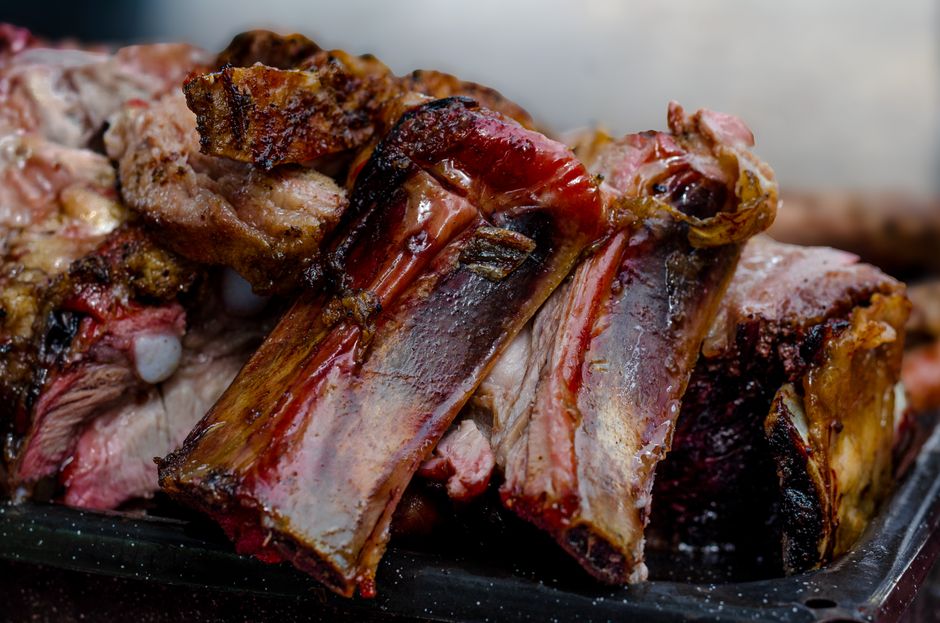
Insane Oven Beef Ribs: The Ultimate Guide to Fall-Off-The-Bone Perfection
Beef ribs, particularly those long, meaty bone-in cuts often referred to as "dino ribs" or plate ribs, represent a culinary Everest for many home cooks. The allure of tender, succulent meat that yields effortlessly to the fork, infused with deep, savory flavors, is undeniable. Achieving this level of perfection in an oven setting, without the need for specialized smokers or lengthy overnight cooks, is entirely attainable with the right approach. This comprehensive guide delves into the intricacies of preparing insane oven beef ribs, focusing on techniques that maximize flavor, moisture, and tenderness, ensuring restaurant-quality results from your kitchen. We will explore critical factors such as rib selection, preparation methods, rub composition, braising techniques, and the crucial resting period that solidifies the melt-in-your-mouth texture.
Selecting the ideal beef ribs is paramount. For oven-cooked beef ribs that truly impress, focus on plate ribs (short ribs that are still attached to a portion of the plate and rib bones) or chuck ribs. These cuts are characterized by abundant marbling – the intramuscular fat that renders down during slow cooking, basting the meat from within and contributing significantly to its tenderness and moisture. Avoid ribs that appear overly lean; while they may cook faster, they will inevitably sacrifice flavor and succulence. Look for ribs with a good thickness, ideally at least 1.5 to 2 inches per bone, ensuring enough mass to withstand prolonged cooking without drying out. The bones themselves should be substantial, indicating a well-developed cut. Consider the "bone on" aspect; the bone acts as a heat conductor, aiding in even cooking, and contributes to the overall flavor profile. When purchasing, inquire about the primal cut from which the ribs were sourced. A well-marbled plate rib will typically offer a superior experience compared to leaner back ribs. The visual inspection is key: the meat should possess a deep red hue, and the fat streaks should be distinct and evenly distributed.
Prepping the beef ribs for oven cooking involves a few crucial steps designed to enhance flavor penetration and ensure a beautiful exterior. Begin by trimming any excessive, hard fat caps. While some fat is essential for moisture, thick, unrendered sheets of fat can impede the rub’s ability to adhere and can become unpleasantly chewy. Use a sharp knife to carefully remove these excess deposits, leaving behind a thin, even layer of fat that will melt and baste the meat. Next, remove the tough membrane, often called the "silver skin," from the bone side of the ribs. This membrane is fibrous and will not break down during cooking, creating a barrier that prevents the rub from reaching the meat and can result in an unpleasant texture. Slide the tip of a sharp knife under the membrane at one end and gently peel it away. If it proves stubborn, a paper towel can provide a better grip. For an even deeper flavor infusion, consider a brining process. A dry brine, involving generously coating the ribs with kosher salt (approximately 1 tablespoon per pound of meat) and letting them rest uncovered in the refrigerator for at least 12-24 hours, draws out moisture initially and then reabsorbs it, seasoned and tenderized. Alternatively, a wet brine, submerging the ribs in a solution of water, salt, and sugar for 4-8 hours, also imparts moisture and flavor. However, if time is limited, a thorough rub application can still yield excellent results.
The rub is the foundation of flavor for any great beef rib. A balanced rub will complement the richness of the beef without overpowering it. A foundational dry rub should include coarse kosher salt and freshly cracked black pepper as the primary components, typically in a 1:1 ratio. To this, incorporate aromatics and complementary spices. Paprika, particularly smoked paprika, adds a beautiful color and a subtle smoky depth. Garlic powder and onion powder provide essential savory notes that meld seamlessly with the beef. A touch of brown sugar, though minimal, helps with caramelization and browning, contributing to a more appealing crust. For a bit of heat, consider cayenne pepper or chili powder. Cumin can add an earthy complexity. The key is to achieve a balance of salty, savory, sweet, and slightly spicy elements. Apply the rub generously, ensuring every surface of the ribs is coated. Gently pat the rub into the meat to ensure good adhesion. Allow the rubbed ribs to sit at room temperature for at least 30 minutes to an hour before cooking, which helps the rub adhere better and allows the meat to come closer to room temperature, promoting more even cooking.
The cooking process for oven beef ribs is a slow and steady affair, aiming for gentle heat to break down the connective tissues responsible for toughness. Preheat your oven to a low temperature, ideally between 275°F (135°C) and 300°F (150°C). A lower temperature facilitates a longer, more controlled cooking time, leading to superior tenderness. For an optimal braising environment, the ribs should be cooked in a heavy-bottomed, oven-safe pot or Dutch oven with a tight-fitting lid. This vessel will trap moisture, creating a steamy environment that keeps the ribs succulent. Arrange the seasoned ribs snugly in the pot, bone-side down if possible, or on their sides. Add a braising liquid to the pot. This liquid is crucial for infusing additional flavor and moisture. A good base can be beef broth or stock, but for an intensified flavor, consider adding elements like red wine, Worcestershire sauce, soy sauce, or even a splash of balsamic vinegar. The liquid should come up about one-third to halfway to the top of the ribs; you don’t want to fully submerge them. Add aromatics to the braising liquid, such as roughly chopped onions, carrots, celery, garlic cloves, and fresh herbs like rosemary or thyme. These vegetables and herbs will soften and release their flavors into the liquid, which will then permeate the ribs.
Once assembled, cover the Dutch oven tightly and place it in the preheated oven. The initial cooking phase will be long, typically ranging from 3 to 5 hours, depending on the thickness and size of the ribs. The goal is to reach an internal temperature of around 195°F to 205°F (90°C to 96°C). This temperature range is where the collagen in the beef begins to break down into gelatin, which is what gives braised meats their signature tender, melt-in-your-mouth texture. Resist the urge to peek too frequently, as each opening of the oven door releases precious heat and steam. After about 2-3 hours, you can check the ribs for tenderness. They should be yielding to gentle pressure. If the liquid level appears low, you can add a little more hot beef broth or water to maintain moisture.
The final stage of oven beef rib preparation involves a crucial step to develop a beautiful, caramelized crust: the glaze and the final broil or uncovered bake. After the initial braising period, when the ribs are tender, carefully remove the Dutch oven from the oven. Transfer the ribs to a baking sheet lined with parchment paper. Strain the braising liquid into a saucepan. Skim off any excess fat from the surface of the liquid. Simmer the strained liquid over medium-high heat until it reduces to a rich, syrupy glaze. This concentrated liquid will be brushed over the ribs. Brush a generous amount of this reduced glaze over the top of each rib. Then, return the glazed ribs to the oven, either under the broiler on a medium setting for a few minutes per side, watching them very closely to prevent burning, or at a slightly higher oven temperature (around 400°F/200°C) for about 15-20 minutes, until the glaze caramelizes and forms a slightly crisp, dark exterior. This final step adds a critical layer of flavor and texture that elevates the dish from good to insane.
The resting period is non-negotiable for achieving optimal results with beef ribs. Once the ribs have finished their final glazing and caramelization, remove them from the oven and let them rest on the baking sheet, loosely tented with foil, for at least 15-20 minutes. This resting period allows the juices that have been pushed towards the surface during cooking to redistribute back into the meat. Skipping this step will result in juices running out onto the plate, leaving the meat drier and less flavorful. During this time, you can further reduce the reserved glaze in the saucepan to achieve your desired consistency for serving. The flavors will meld, the meat will relax, and the tenderness will be amplified.
Serving these insane oven beef ribs is an event. Plate them proudly, spooning any extra glaze over the top. They are incredibly versatile, pairing well with classic comfort food sides like mashed potatoes, mac and cheese, coleslaw, or roasted root vegetables. The depth of flavor and unparalleled tenderness will leave a lasting impression. The journey from raw beef ribs to this fall-off-the-bone masterpiece is a testament to the power of slow cooking and thoughtful preparation, proving that truly insane beef ribs are not exclusive to professional kitchens. By understanding and implementing these techniques, any home cook can achieve a level of beef rib perfection that is undeniably satisfying and remarkably delicious. The rich, unctuous meat, imbued with layers of savory flavor and boasting a tender texture that requires minimal effort to consume, makes this dish a worthy undertaking for any serious food enthusiast.