
Pan Seared Chicken Tenderloin
Pan-Seared Chicken Tenderloin: The Ultimate Guide to Perfect, Flavorful Results
Pan-searing chicken tenderloin is a straightforward yet highly rewarding cooking technique that yields exceptionally tender, juicy, and flavorful results. This method, often overlooked for larger chicken cuts, offers a quick and versatile way to prepare lean protein for weeknight meals, elegant dinners, or as a component in more elaborate dishes. The key to pan-seared chicken tenderloin lies in achieving a beautiful, golden-brown crust on the exterior while ensuring the interior remains moist and fully cooked. This guide will delve into every aspect of achieving this culinary perfection, from selecting the right chicken to mastering the searing process and exploring a myriad of flavor profiles.
Understanding Chicken Tenderloin: Properties and Preparation
Chicken tenderloin, also known as chicken tenders or chicken strips, are the Pectoralis minor muscles located beneath the Pectoralis major (the main breast meat). They are inherently tender due to their lower usage by the chicken and their smaller size, which contributes to faster cooking times. This makes them an ideal choice for pan-searing, minimizing the risk of overcooking and dryness. When purchasing chicken tenderloins, opt for fresh, plump pieces with a uniform thickness. If you buy a whole chicken breast, you can easily remove the tenderloins yourself by locating them and carefully slicing them away from the main breast. For optimal searing, ensure the tenderloins are relatively uniform in thickness. If they vary significantly, you can either gently pound the thicker ones to match the thinner ones or trim them accordingly. This uniformity is crucial for even cooking, preventing some pieces from being overcooked while others remain underdone. Before searing, it is imperative to pat the chicken tenderloins thoroughly dry with paper towels. Moisture is the enemy of a good sear; it steams the chicken instead of browning it, resulting in a pale and less appealing exterior. This drying step allows the Maillard reaction, the chemical process responsible for browning and developing complex flavors, to occur efficiently.
Seasoning Strategies: Building Flavor from the Base
The foundation of any delicious pan-seared dish is proper seasoning. For chicken tenderloin, a simple yet effective approach involves salt and freshly ground black pepper. These two staples enhance the natural flavor of the chicken and create a savory base. Apply them liberally and evenly on all sides of the dried tenderloins. For those seeking more depth, consider a dry rub. This can include a blend of garlic powder, onion powder, paprika (sweet, smoked, or hot), cayenne pepper for a touch of heat, dried herbs like oregano, thyme, or rosemary, or even a pinch of sugar to aid in caramelization. When using a dry rub, ensure it adheres well to the chicken by lightly pressing it into the surface. Another popular seasoning method is marinating. While tenderloins cook quickly, a short marinade can infuse them with significant flavor. Acidic ingredients like lemon juice, lime juice, or vinegar, combined with oil and aromatics such as garlic, ginger, and herbs, can tenderize and flavor the chicken in as little as 15-30 minutes. Avoid marinating for excessively long periods (more than a few hours for tenderloins) with strong acids, as it can begin to break down the protein too much, resulting in a mushy texture. Alternatively, a simple brine, a solution of salt and water, can also be used for about 30 minutes to an hour to increase moisture retention and tenderness.
The Searing Technique: Achieving the Perfect Crust
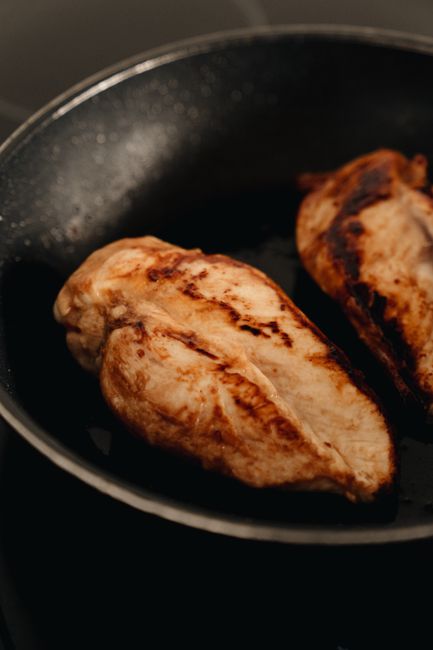
The pan-searing technique is paramount for pan-seared chicken tenderloin. The choice of pan is important. A heavy-bottomed skillet, such as cast iron or stainless steel, is ideal because it distributes heat evenly and retains that heat, facilitating a consistent and efficient sear. Avoid non-stick pans if you are aiming for a deeply golden crust, as they often don’t achieve the same level of browning. The cooking fat is another critical element. A high smoke point oil, like vegetable oil, canola oil, grapeseed oil, or clarified butter (ghee), is recommended. Olive oil can be used, but extra virgin olive oil has a lower smoke point and can burn, imparting an undesirable flavor. Start by heating the oil in the skillet over medium-high heat until it shimmers. It’s crucial not to overcrowd the pan. Cook the tenderloins in batches if necessary. Overcrowding lowers the pan temperature, leading to steaming rather than searing, and will prevent you from achieving that sought-after crust. Place the seasoned and dried tenderloins into the hot oil, ensuring they have space between them.
Cooking Times and Temperature: The Sweet Spot for Juiciness
Once the tenderloins are in the pan, resist the urge to move them immediately. Allow them to sear undisturbed for 2-4 minutes per side, depending on their thickness. The goal is to develop a rich, golden-brown crust. You will notice that the sides of the tenderloins begin to change color as they cook. Flip them and sear the other side for another 2-4 minutes. The total cooking time will typically range from 6 to 10 minutes. The most reliable way to ensure your chicken tenderloin is cooked through and perfectly juicy is to use an instant-read thermometer. Insert the thermometer into the thickest part of the tenderloin. The safe internal temperature for chicken is 165°F (74°C). However, for maximum juiciness, many chefs prefer to remove the tenderloins from the heat when they reach an internal temperature of 160-162°F (71-72°C), as they will continue to cook slightly from residual heat while resting. Overcooked chicken tenderloin can quickly become dry and tough, so vigilance with the thermometer is key.
Resting: The Crucial Final Step for Moisture Retention
After searing, it is absolutely essential to let the chicken tenderloins rest. Remove them from the skillet and place them on a clean plate or a cutting board. Tent them loosely with aluminum foil. This resting period, typically 5-10 minutes, allows the juices within the meat to redistribute evenly. If you cut into the chicken immediately after cooking, the juices will run out onto the plate, resulting in a drier final product. The resting time allows these juices to reabsorb, ensuring each bite is succulent and flavorful.
Flavor Enhancements and Sauce Pairings: Elevating the Dish
While plain pan-seared chicken tenderloin is delicious, the true versatility of this method shines through with various flavor additions and sauce pairings. After searing, you can deglaze the pan with a liquid to create a pan sauce. Common deglazing liquids include chicken broth, white wine, or even water. Scrape up any browned bits (fond) from the bottom of the pan, as these are packed with flavor. Add aromatics like minced garlic, shallots, or herbs, and let them sauté for a minute before adding your deglazing liquid. Reduce the sauce until it thickens slightly. You can then enrich the sauce with a knob of butter for glossiness and a richer mouthfeel, or a swirl of heavy cream for a more decadent finish. Lemon butter sauce, white wine mushroom sauce, honey garlic glaze, or a simple herb butter are all excellent companions to pan-seared chicken tenderloin. For a quicker flavor boost, consider basting the chicken with butter, garlic, and herbs during the final minutes of cooking. The butter will melt and combine with the herbs and garlic, coating the chicken in a fragrant and flavorful glaze.
Culinary Applications: Beyond the Plate
Pan-seared chicken tenderloin is a building block for countless dishes. It can be sliced and served over salads, incorporated into pasta dishes, added to stir-fries, used in sandwiches or wraps, or presented as a standalone protein with a variety of side dishes. Its mild flavor profile makes it a receptive canvas for a wide array of culinary creations. When slicing, always cut against the grain of the meat for maximum tenderness. This is particularly important if the tenderloins are slightly overcooked or if you are using them in a dish where they will be eaten cold.
Troubleshooting Common Issues: Perfecting the Process
One common issue is chicken that is tough or dry. This is almost always a result of overcooking. Precise temperature monitoring with an instant-read thermometer and adhering to recommended cooking times are the most effective preventative measures. Another challenge is achieving a good sear. Ensure the pan is sufficiently hot, the oil is shimmering, and the chicken is thoroughly dried before it hits the pan. If the chicken sticks to the pan, it likely means it hasn’t developed a proper crust yet. Give it more time to sear undisturbed before attempting to flip it. If the chicken is browning too quickly and the inside is not yet cooked, reduce the heat slightly and consider finishing it in the oven for a few minutes at a moderate temperature (around 350°F or 175°C). This is a good technique for thicker tenderloins to ensure they cook through without burning the exterior.
Nutritional Benefits of Chicken Tenderloin
Chicken tenderloin is a lean source of high-quality protein, essential for muscle repair and growth, satiety, and overall body function. It is also relatively low in fat, particularly saturated fat, making it a heart-healthy choice. Additionally, chicken is a good source of B vitamins, such as niacin and vitamin B6, which play crucial roles in energy metabolism and brain function. It also provides minerals like selenium, important for thyroid function and immune health, and phosphorus, vital for bone health. When prepared using healthy cooking methods like pan-searing with minimal added fat, chicken tenderloin contributes significantly to a balanced and nutritious diet.
Conclusion: Mastering the Art of Pan-Seared Chicken Tenderloin
Pan-seared chicken tenderloin is a culinary cornerstone that offers simplicity, speed, and exceptional flavor. By understanding the nuances of selecting, preparing, seasoning, and cooking this versatile cut, you can consistently achieve tender, juicy, and beautifully browned results. The techniques discussed—from achieving a dry surface for optimal searing to the critical resting period and the endless possibilities for flavor enhancement—empower any home cook to elevate their weeknight meals and impress guests. Embrace the art of pan-searing and discover the profound satisfaction of perfectly cooked chicken tenderloin, a delicious testament to the power of mastering fundamental cooking techniques.


