
Brown Butter In The Microwave
Mastering Microwave Brown Butter: The Swift & Simple Path to Nutty Bliss
The quest for perfectly browned butter, with its characteristic nutty aroma and rich, complex flavor, often conjures images of carefully monitored stovetops, precise heat control, and the ever-present risk of burning. However, a remarkably efficient and surprisingly foolproof method exists for achieving this culinary gold: the microwave. This article demystifies the process of browning butter in the microwave, offering detailed instructions, troubleshooting tips, and a comprehensive exploration of why this technique works, making it accessible to home cooks of all skill levels and optimizing for search engine visibility for those seeking "how to brown butter microwave," "easy brown butter recipe," "microwave butter browning," and "quick nutty butter."
The microwave, often relegated to reheating leftovers and popping popcorn, possesses a unique ability to generate intense heat rapidly and unevenly, a characteristic that can be harnessed to brown butter with impressive speed and minimal fuss. Unlike the stovetop, where heat is applied from below, the microwave’s electromagnetic waves penetrate the butter, exciting water molecules and causing them to heat and evaporate. This internal heating mechanism, when managed correctly, leads to the Maillard reaction, the same chemical process responsible for the browning of meats and the development of complex flavors in baked goods, occurring within the butter itself. The key to success lies in understanding the microwave’s power and controlling the browning process through strategic intervals of heating and observation. The goal is to coax the milk solids within the butter to toast and caramelize without scorching, transforming bland yellow fat into a golden elixir.
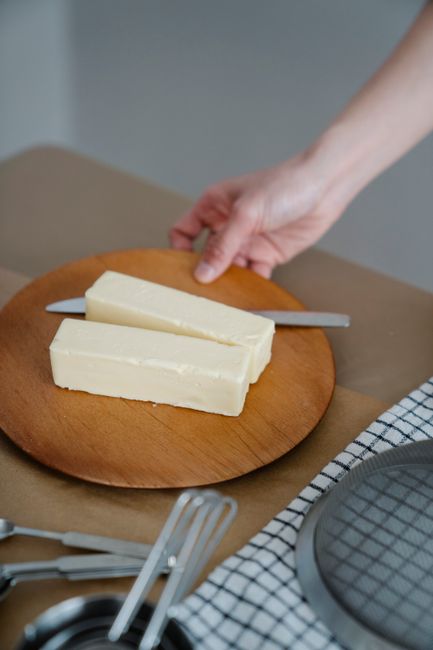
To embark on your microwave brown butter journey, begin with high-quality unsalted butter. The fat content of unsalted butter is generally higher and more consistent than salted butter, allowing for a cleaner browning process with less interference from dissolved salt. Cut the butter into uniform pieces, typically ½-inch cubes, to ensure even melting. This preliminary step is crucial for consistent results, as unevenly sized pieces will melt and brown at different rates, potentially leading to some areas burning while others remain underdone. Place the cubed butter in a microwave-safe bowl. Glass or ceramic bowls are ideal, as they are non-reactive and allow for easy visual inspection of the butter’s progress. Avoid plastic containers, which can warp or leach chemicals under heat. The choice of bowl is not insignificant; a wider, shallower bowl will promote more even heating and easier observation compared to a tall, narrow one.
The initial heating phase is critical. Microwave the butter on high power for approximately 30-60 seconds. This initial burst of energy will melt the butter. At this stage, the butter will appear clear and liquid. It is essential to stop the microwave immediately once the butter is fully melted. Overheating at this point will only bring you closer to the point of burning without initiating the browning process effectively. Remove the bowl from the microwave. You will observe that the butter is now completely liquid. Observe the surface of the liquid butter closely. You might notice tiny specks of white, which are the milk solids beginning to separate from the fat. This is a positive sign, indicating that the browning process is about to commence.
The true magic happens in the subsequent heating intervals. Return the bowl to the microwave, but this time, opt for shorter bursts of power, ideally 15-20 seconds at a time. Crucially, after each interval, remove the bowl and gently swirl the butter. This swirling is paramount. It redistributes the heat, preventing hot spots and ensuring that the milk solids come into contact with the heated fat uniformly. As you continue this cycle of microwaving and swirling, you will witness a dramatic transformation. The clear liquid butter will begin to foam, and small, white specks will appear and then gradually darken. These specks are the milk solids undergoing caramelization. The aroma will also begin to change, shifting from a simple buttery scent to a richer, nuttier fragrance.
The visual cues are your most reliable indicators of progress. Continue the 15-20 second microwaving and swirling intervals, paying close attention to the color of the milk solids and the butter itself. The specks will transition from white to pale yellow, then to a golden brown, and finally to a richer, darker brown. The liquid butter will also deepen in color, moving from pale yellow to a golden amber hue. The aroma will intensify, becoming unmistakably nutty and toasty. The point at which you stop microwaving is entirely dependent on your desired level of browning. For a light brown butter with subtle nutty notes, stop when the specks are a light golden brown. For a more pronounced flavor, continue until they are a deeper brown, resembling toasted nuts. The key is to stop before the specks turn black or the butter itself begins to smoke, which indicates burning. This often happens surprisingly quickly, so constant vigilance is key.
Troubleshooting is an integral part of mastering any new cooking technique, and microwave brown butter is no exception. The most common pitfall is over-browning, leading to a burnt, acrid flavor. If you notice the milk solids turning black or detect a smoky aroma, you have likely gone too far. Unfortunately, burnt brown butter cannot be salvaged. The best course of action is to discard it and start again, paying closer attention to the visual cues and reducing the microwaving time per interval. Conversely, under-browning will result in butter that is simply melted but lacks the characteristic nutty flavor and aroma. If your butter is fully melted but the milk solids are still white or only faintly yellow, it needs more time. Return it to the microwave for another short interval and continue the swirling process.
Microwave power levels vary significantly between appliances, and this will directly impact the browning time. A higher-powered microwave will cook faster, requiring shorter intervals and more frequent checks. Conversely, a lower-powered microwave will take longer, allowing for slightly longer intervals but still demanding regular observation. It is advisable to know your microwave’s wattage and adjust your timing accordingly. Initially, it’s better to err on the side of caution and use shorter microwaving times. You can always add more time, but you cannot undo over-browning. A good starting point for a standard 1000-watt microwave is 30 seconds for the initial melt, followed by 15-second intervals. For lower wattage microwaves, you might extend the initial melt to 45-60 seconds and then use 20-second intervals.
The amount of butter you are browning will also influence the timing. Larger quantities of butter will take longer to melt and brown than smaller amounts. If you are browning a full stick (½ cup) of butter, expect the process to take longer than browning just a few tablespoons. When working with larger amounts, consider using a wider bowl to ensure more surface area exposure to the microwave’s energy, promoting more even browning. Always adjust your interval lengths based on the quantity of butter being browned.
Once your butter has reached the desired level of browning, immediately remove the bowl from the microwave and give it a final, thorough swirl. The residual heat will continue to cook the butter for a short period, so it’s important to stop at the precise moment you are happy with the color and aroma. Let the brown butter cool slightly in the bowl. As it cools, you will notice that the milk solids settle at the bottom of the bowl. This is perfectly normal and contributes to the flavor.
For recipes that call for strained brown butter, you can pour the cooled brown butter through a fine-mesh sieve lined with cheesecloth or a coffee filter to separate the clarified butter from the toasted milk solids. However, for many applications, especially baking, incorporating the milk solids along with the butter is desirable for added texture and flavor. Store your brown butter in an airtight container in the refrigerator. It will solidify as it cools and can be stored for up to two weeks. Reheating it is as simple as placing the required amount back in a microwave-safe dish for a few seconds.
The applications for microwave-browned butter are virtually endless and incredibly versatile, elevating a multitude of dishes. In baking, it is a transformative ingredient for cookies, brownies, cakes, and pastries. The nutty depth it imparts is unparalleled, creating a more sophisticated flavor profile than regular melted butter. Think of brown butter chocolate chip cookies – the nutty notes complement the sweetness and richness of the chocolate beautifully. Brown butter adds a luxurious mouthfeel to blondies and a complex foundation to pie crusts. Even a simple pound cake benefits immensely from the nuanced flavor of brown butter.
Savory applications are equally compelling. Drizzled over roasted vegetables like Brussels sprouts or asparagus, it adds a sophisticated, nutty finish. It’s a superb base for pan sauces, enhancing the flavor of chicken, fish, or pork. Consider browning butter and then sautéing mushrooms in it for an intensely flavorful side dish. It can be used to finish pasta dishes, adding a rich, toasted undertone. Even a simple scrambled egg or omelet can be elevated by cooking it in brown butter. The nutty notes also pair exceptionally well with seafood, adding a delicate complexity. Imagine seared scallops finished with a drizzle of fragrant brown butter.
The process of browning butter in the microwave is not merely a shortcut; it is a refined technique that leverages the microwave’s unique heating properties to achieve a culinary goal efficiently and reliably. By understanding the underlying principles of microwave heating and the visual and aromatic cues of the browning process, home cooks can confidently master this method. The speed and simplicity make it an ideal solution for when time is a constraint or when a spontaneous craving for nutty, caramelized goodness strikes. This accessible technique empowers even novice cooks to unlock the rich, complex flavors of brown butter, opening up a world of culinary possibilities and optimizing search results for those seeking "easy brown butter in microwave," "microwave brown butter for cookies," and "quick nutty butter recipe."


