
Grilled Tri Tip Roast
The Ultimate Guide to Grilling the Perfect Tri-Tip Roast
Tri-tip, also known as the bottom sirloin or triangle roast, is a flavorful and economical cut of beef that has gained immense popularity for its grilling potential. Its unique triangular shape and lean yet tender texture make it ideal for high-heat cooking, resulting in a deeply savory and juicy steak-like experience. This comprehensive guide will cover everything you need to know to master the art of grilling tri-tip, from selecting the right cut to achieving that perfect medium-rare finish. We’ll delve into essential preparation techniques, optimal grilling methods, temperature targets, resting protocols, and even offer creative serving suggestions to elevate your tri-tip experience. Understanding the nuances of this cut is key to unlocking its full potential, and with the right knowledge and approach, you’ll be grilling restaurant-quality tri-tip in no time.
Selecting the Ideal Tri-Tip Roast: The Foundation of Flavor
The journey to a perfect grilled tri-tip begins with selecting a quality cut. Look for tri-tip roasts that are approximately 1.5 to 2.5 pounds. A well-marbled roast will offer more flavor and moisture. Pay attention to the color; a deep red hue indicates freshness. While tri-tip is naturally lean, some fat cap on one side is desirable as it will render during cooking, basting the meat and adding richness. Avoid roasts that appear overly dry or have excessive connective tissue. If possible, purchase from a reputable butcher who can guide you on the best cuts available. Sometimes, tri-tip is sold as part of a larger sirloin subprimal, so inquire if your butcher can trim it down for you. The grain of the meat should be clearly visible; understanding its direction is crucial for slicing later.
Preparation is Paramount: Seasoning and Marinades for Tri-Tip
Once you’ve secured your tri-tip, proper preparation is essential. While tri-tip has inherent flavor, judicious seasoning will enhance it further. The most straightforward and often preferred method is a simple rub of coarse salt (like kosher or sea salt) and freshly cracked black pepper. Apply the rub generously on all sides of the roast, ensuring even coverage. For a more complex flavor profile, consider a dry rub incorporating garlic powder, onion powder, paprika (sweet or smoked), and a touch of cayenne for heat. Allow the seasoned tri-tip to sit at room temperature for at least 30 minutes, or up to an hour, before grilling. This allows the salt to begin its work, drawing out moisture and then reabsorbing it, resulting in a more tender and flavorful interior.
Marinades can also be employed, but with tri-tip, it’s important to note that its lean nature means it won’t absorb marinades as deeply or quickly as fattier cuts. If you choose to marinate, opt for acidic marinades that include ingredients like lemon juice, vinegar, or wine, which can help tenderize the meat. Common marinade ingredients include olive oil, garlic, herbs (rosemary, thyme), Worcestershire sauce, and soy sauce. Marinate for a minimum of 2 hours, but avoid marinating for more than 12 hours, as the acid can begin to break down the meat’s texture excessively, leading to a mushy consistency. Remember to pat the tri-tip dry thoroughly after marinating to ensure a good sear on the grill.
Grilling Techniques for Tri-Tip: Mastering the Heat
The key to a perfectly grilled tri-tip lies in controlling the heat and cooking to the appropriate internal temperature. Tri-tip is best cooked using a two-zone grilling method, which allows for both searing and indirect cooking.
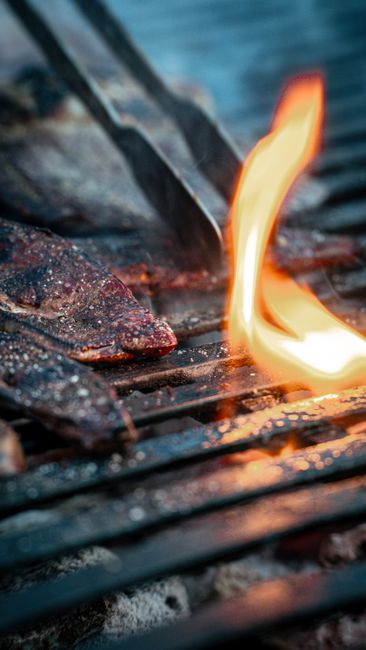
Direct Grilling (Searing): This method is ideal for smaller tri-tips or when you want a very quick sear. Preheat your grill to high heat (450-500°F or 230-260°C). Place the seasoned tri-tip directly over the hottest part of the grill. Sear for 2-3 minutes per side, aiming for a deep brown crust. Rotate the roast every minute or so to ensure even searing and prevent flare-ups. Once a good crust has formed on all sides, move the tri-tip to the cooler, indirect heat zone of the grill.
Two-Zone Grilling (Recommended Method): This is the most effective method for consistently perfect results. Set up your grill for two-zone cooking, with one side being the direct heat zone (hot coals or burners on) and the other being the indirect heat zone (coals banked to one side or burners off). Preheat the entire grill to medium-high heat (around 400-450°F or 200-230°C).
- Searing: Place the seasoned tri-tip on the direct heat side of the grill. Sear for 2-3 minutes per side, until a beautiful crust develops.
- Indirect Cooking: Immediately move the tri-tip to the indirect heat side of the grill. Close the lid and allow the roast to cook gently. This method allows the interior to cook evenly without burning the exterior.
Temperature is King: Achieving the Perfect Doneness
Internal temperature is the most reliable indicator of doneness for any grilled meat, and tri-tip is no exception. Invest in a good instant-read meat thermometer. For tri-tip, the target internal temperatures are as follows:
- Rare: 120-125°F (49-52°C) – Deep red center, very soft.
- Medium-Rare (Recommended): 130-135°F (54-57°C) – Bright red center, slightly firmer. This is generally considered the optimal doneness for tri-tip, offering the best balance of tenderness and flavor.
- Medium: 135-140°F (57-60°C) – Pinkish-red center, noticeably firmer.
- Medium-Well: 140-145°F (60-63°C) – Slightly pink center, firm.
- Well-Done: 145°F+ (63°C+) – Little to no pink, very firm. Avoid cooking tri-tip past medium-well, as it can become dry and tough.
Remember that the internal temperature will rise an additional 5-10°F (3-6°C) during the resting period (carryover cooking), so remove the tri-tip from the grill when it’s a few degrees below your target temperature.
The Crucial Rest: Allowing Juices to Redistribute
This is a non-negotiable step that many home cooks overlook, leading to dry, less flavorful meat. Once your tri-tip reaches its desired internal temperature, remove it from the grill and place it on a clean cutting board. Tent it loosely with aluminum foil. Allow the tri-tip to rest for at least 10-15 minutes. This resting period is crucial because it allows the muscle fibers to relax and the juices to redistribute throughout the roast. If you cut into the meat immediately after grilling, all those delicious juices will run out onto the cutting board, leaving you with a drier steak.
Slicing for Maximum Enjoyment: Against the Grain is Key
The way you slice your tri-tip can make a significant difference in its perceived tenderness. Tri-tip has a distinct grain, which refers to the direction of the muscle fibers. You will notice that the grain runs in one direction on one side of the roast and then changes direction on the other. It’s imperative to slice the tri-tip against the grain.
- Identify the Grain: Look closely at the roast. You’ll see the long, parallel lines of muscle fibers.
- Slice Against the Grain: Once you’ve identified the direction of the grain, use a sharp knife to slice across these fibers, perpendicular to their direction. This shortens the muscle fibers, making each bite much more tender and easier to chew.
- Thin Slices: Aim for relatively thin slices, about 1/4 to 1/2 inch thick.
If you’re having trouble identifying the grain, you can cut the roast in half perpendicular to its widest point. This will expose the grain more clearly on both halves, making it easier to slice against it.
Serving Suggestions: Elevating Your Tri-Tip Creation
Grilled tri-tip is incredibly versatile and can be enjoyed in numerous ways:
- Classic Steak Dinner: Serve thick slices of tri-tip with your favorite steakhouse sides like mashed potatoes, grilled asparagus, or a fresh green salad.
- Tri-Tip Sandwiches/Tacos: Slice the tri-tip thinly and use it as the star of gourmet sandwiches, loaded with caramelized onions, aioli, and sharp cheese, or pile it into warm tortillas for delicious tri-tip tacos with your preferred toppings.
- Salads: Diced or thinly sliced tri-tip makes an excellent addition to hearty salads, providing a protein-rich and flavorful element. Consider a Southwestern-inspired salad with corn, black beans, avocado, and a lime vinaigrette.
- Appetizers: Small cubes of tri-tip can be served as skewers with a flavorful marinade or glaze, or as part of a charcuterie board.
- Stir-fries: Thinly sliced tri-tip can be a quick and easy protein for vibrant vegetable stir-fries.
Troubleshooting Common Tri-Tip Grilling Issues
- Flare-ups: If fat drips onto the coals and causes excessive flames, move the tri-tip to a cooler part of the grill or briefly to the indirect zone until the flames subside. Ensure your grill grates are clean to minimize sticking.
- Uneven Cooking: This often points to an uneven heat distribution on your grill or not rotating the roast sufficiently. If using a charcoal grill, ensure your coals are evenly spread in the direct heat zone.
- Dry Tri-Tip: This is usually a result of overcooking or not resting the meat adequately. Always rely on a meat thermometer and don’t skip the resting period.
The Appeal of Tri-Tip: Why It’s a Grilling Favorite
Tri-tip’s rise in popularity is well-deserved. It offers a fantastic balance of flavor, texture, and affordability compared to premium steak cuts. Its lean nature means it’s a healthier option, and its quick cooking time makes it an ideal choice for weeknight grilling or entertaining a crowd. The adaptability of tri-tip, from simple seasoned slices to more elaborate dishes, further cements its status as a grilling champion. Mastering this cut allows you to impress guests and elevate your home cooking with a delicious and satisfying beef dish. By understanding the fundamental principles of selection, preparation, grilling, and resting, you can consistently achieve a perfectly grilled tri-tip that will become a regular feature on your barbecue menu.


