
Host Https Www Allrecipes Com Recipe 272531 Perfect Sourdough Bread Sticks
Perfect Sourdough Bread Sticks: A Comprehensive Guide to https://www.allrecipes.com/recipe/272531/perfect-sourdough-bread-sticks/
The pursuit of perfectly chewy, tangy, and delightfully crisp sourdough bread sticks is a rewarding culinary journey. This article delves deep into the intricacies of crafting the ideal sourdough bread sticks, drawing inspiration and techniques from the highly-rated recipe found at https://www.allrecipes.com/recipe/272531/perfect-sourdough-bread-sticks/. We will explore the fundamental principles of sourdough baking, the specific requirements of this recipe, and offer expert tips to ensure your success, transforming simple ingredients into an artisanal delight. Understanding the nuances of sourdough starter, dough hydration, fermentation, shaping, and baking is crucial for achieving that sought-after texture and flavor.
The cornerstone of any exceptional sourdough bread stick is a healthy, active, and bubbly sourdough starter. This living culture of wild yeast and bacteria is responsible for both the leavening and the characteristic tangy flavor of sourdough. Before embarking on the bread stick recipe, ensure your starter is at its peak. This typically means feeding it 4-12 hours before you plan to mix your dough. A fed starter will have doubled or tripled in volume, be filled with bubbles, and possess a pleasant, slightly acidic aroma. If your starter is sluggish, a few consistent feedings can revive it. For this specific recipe, using a starter that has been recently fed and is active will contribute significantly to the rise and overall texture of the bread sticks. The recipe likely assumes a starter with a hydration of 100% (equal parts flour and water by weight), which is standard for most sourdough bakers. The consistency of your starter will impact the final dough’s hydration, so it’s important to be aware of its properties.
Dough hydration is a critical factor in determining the texture of bread sticks. The recipe at https://www.allrecipes.com/recipe/272531/perfect-sourdough-bread-sticks/ will specify a hydration level, which is the ratio of water to flour by weight. Higher hydration doughs tend to produce more open crumb structures and a crispier crust, desirable qualities for bread sticks. However, they are also more challenging to handle, requiring a gentle touch and often the use of techniques like stretch and folds. Lower hydration doughs are easier to manage but may result in a denser crumb. The recipe’s recommended hydration is designed to strike a balance, allowing for a manageable dough that still yields excellent results. Pay close attention to the flour used in the recipe. All-purpose flour is common, but bread flour, with its higher protein content, can provide better gluten development, leading to a chewier texture. Some recipes might also incorporate whole wheat flour for added flavor and nutrition, but for a classic bread stick, a good quality all-purpose or bread flour is usually preferred.
The process of autolyse is often employed in sourdough baking to begin gluten development before intensive kneading. This involves mixing the flour and water and letting it rest for a period. During this rest, the flour absorbs water, and enzymes begin to break down starches into sugars, which are then available for the yeast and bacteria. This initial hydration also helps to form a more extensible dough, making it easier to handle during the subsequent mixing and shaping stages. While not explicitly stated in every recipe, considering an autolyse period of 30 minutes to an hour can significantly improve the dough’s texture and workability. For the specific recipe on Allrecipes, it’s worth checking if an autolyse is suggested or if the ingredients are mixed and developed more directly.
Incorporating the sourdough starter and salt into the dough is the next crucial step. The starter provides the leavening and flavor, while salt plays a vital role in controlling fermentation, strengthening gluten, and enhancing the overall flavor profile. When adding salt, ensure it is evenly distributed throughout the dough. Over-salting can inhibit yeast activity, while under-salting can lead to a bland product and an overly fast fermentation. The amount of salt is typically around 1.8-2% of the total flour weight, a standard in artisan bread baking. For the Allrecipes recipe, adhere strictly to the salt measurement provided to ensure optimal results.
Bulk fermentation, also known as the first rise, is where the magic of sourdough truly unfolds. During this period, the yeast and bacteria in the starter work to leaven the dough, producing carbon dioxide gas and developing complex flavors. For bread sticks, a controlled bulk fermentation is key to achieving both a good rise and a pleasant tang. This process often involves a series of "stretch and folds." Stretch and folds are a gentle way to develop gluten by stretching a portion of the dough upwards and folding it over onto itself. This is repeated a few times around the bowl, creating tension and building a strong gluten network without the harshness of traditional kneading. The number of stretch and folds and the intervals between them will depend on the ambient temperature and the activity of your starter. In warmer conditions, fermentation will be faster, requiring fewer folds. In cooler conditions, you’ll need more folds and a longer fermentation time. The Allrecipes recipe will likely provide guidance on the duration of bulk fermentation and the method for checking if the dough is ready, often indicated by an increase in volume (typically 30-50%) and a jiggly, aerated texture.
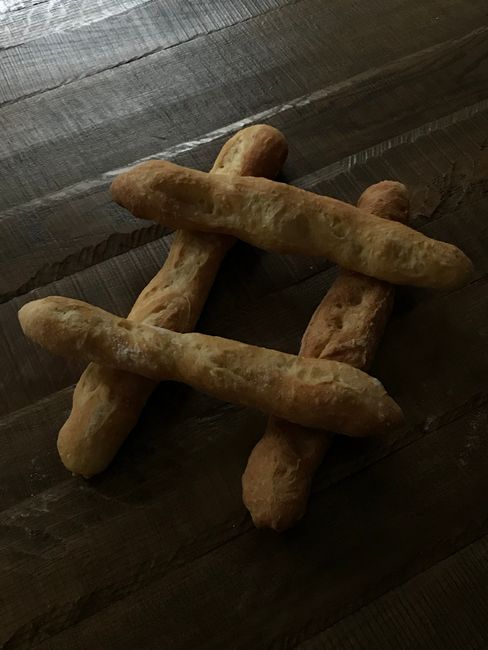
The "perfect" sourdough bread stick often boasts a crisp exterior that gives way to a slightly chewy and airy interior. Achieving this textural contrast requires careful attention to both dough hydration and the baking process. The recipe at https://www.allrecipes.com/perfect-sourdough-bread-sticks/ will likely outline specific shaping techniques designed to maximize surface area for crisping. This could involve rolling the dough thinly and cutting it into strips, or perhaps shaping them into more elongated forms. The thickness of the bread sticks will directly influence their crispness. Thinner bread sticks will become crispier faster than thicker ones.
Preheating your oven to the correct temperature is paramount for achieving that signature sourdough crust. A hot oven is essential for oven spring, the rapid expansion of the dough when it first hits the heat. This oven spring contributes to a lighter crumb and a crispier exterior. Many sourdough recipes benefit from baking in a preheated Dutch oven or on a baking steel/stone. These surfaces retain heat exceptionally well and transfer it efficiently to the dough, promoting even baking and a superior crust. If the Allrecipes recipe suggests a particular baking vessel or surface, follow it closely.
The inclusion of steam in the initial stages of baking is a well-established technique for achieving a perfect sourdough crust. Steam keeps the surface of the dough moist, allowing it to expand fully before a crust begins to form. This results in a thinner, crispier crust and a more pronounced oven spring. A common method for creating steam is to place a pan of hot water on a lower rack in the oven when preheating. Alternatively, some bakers use a cast-iron skillet or a spray bottle to introduce steam. The Allrecipes recipe may provide a specific method for steam generation, or you might need to experiment to find what works best with your oven. Baking the bread sticks uncovered for the latter part of the bake allows them to dry out and develop a desirable crispness.
The exact duration of baking will depend on the thickness of your bread sticks and your oven’s characteristics. The recipe at https://www.allrecipes.com/recipe/272531/perfect-sourdough-bread-sticks/ will provide a time range, but it’s crucial to monitor the bread sticks visually. They should be golden brown, firm to the touch, and sound hollow when tapped on the bottom. Over-baking can lead to dry, burnt bread sticks, while under-baking will result in a doughy interior and a less crisp exterior. Using an instant-read thermometer to check for an internal temperature of around 200-210°F (93-99°C) can also be a reliable indicator of doneness.
Seasoning plays a significant role in elevating sourdough bread sticks from good to exceptional. The Allrecipes recipe likely suggests classic seasonings such as coarse sea salt, garlic powder, onion powder, or herbs like rosemary and thyme. These can be applied before baking or sometimes after the bread sticks have cooled slightly. For an even more flavorful bread stick, consider brushing them with olive oil or melted butter before or after baking, and then generously sprinkling with your chosen seasonings. The heat of the oven will infuse these flavors into the bread sticks, creating an irresistible aroma and taste. Experimentation with different herb and spice combinations can lead to unique and personalized variations.
The cooling process for sourdough bread sticks is as important as their baking. Once removed from the oven, transfer them to a wire rack to cool completely. This allows air to circulate around them, preventing the bottoms from becoming soggy and ensuring they achieve their maximum crispness. Resist the urge to cut into them too early, as they will continue to firm up as they cool. Proper cooling contributes to the satisfying crunch that is characteristic of a well-made bread stick.
For those who are new to sourdough baking or looking to troubleshoot specific issues, understanding the variables is key. The Allrecipes recipe serves as an excellent foundation, but factors like ambient temperature, humidity, and the specific characteristics of your sourdough starter can influence the outcome. If your dough isn’t rising as expected, it could be due to an inactive starter, insufficient bulk fermentation, or an oven that’s not hot enough. If your bread sticks are too soft, it might be a hydration issue, insufficient baking time, or a lack of steam during the initial baking phase. Conversely, if they are too hard or burnt, it could be over-baking or an oven that’s too hot. Patience and observation are your greatest allies in sourdough baking.
Beyond the fundamental recipe, consider ways to enhance your sourdough bread sticks. Incorporating cheese, such as grated Parmesan or cheddar, into the dough can add a savory dimension. A sprinkle of everything bagel seasoning before baking offers a delightful combination of flavors and textures. For a touch of sweetness, a drizzle of honey or a sprinkle of sesame seeds can be a welcome addition. The flexibility of sourdough dough allows for creative exploration, and the Allrecipes recipe provides a solid base upon which to build your own signature bread sticks.
In conclusion, mastering the art of perfect sourdough bread sticks, as exemplified by the recipe at https://www.allrecipes.com/recipe/272531/perfect-sourdough-bread-sticks/, is achievable with careful attention to detail and a solid understanding of sourdough principles. From nurturing a vibrant starter to mastering fermentation, shaping, and baking techniques, each step contributes to the final delectable outcome. By embracing the inherent variability of sourdough and applying the knowledge gained from this comprehensive guide, you will be well on your way to producing consistently outstanding sourdough bread sticks that are sure to impress. The journey is as rewarding as the destination, with each batch offering an opportunity for refinement and culinary discovery.


