
The Best Rolled Sugar Cookies
The Definitive Guide to Perfect Rolled Sugar Cookies: Crafting Classic Delights
Achieving the perfect rolled sugar cookie is a culinary art, a delicate balance of flavor, texture, and visual appeal. These aren’t your everyday drop cookies; they require precision, patience, and a solid understanding of fundamental baking principles. The ideal rolled sugar cookie boasts a tender, slightly crisp exterior that yields to a soft, buttery interior. Its flavor profile is a pure, unadulterated sweetness, allowing the quality of the butter and vanilla to shine. The foundation of any exceptional rolled sugar cookie recipe lies in its simplicity, focusing on high-quality ingredients and meticulous technique. This guide will demystify the process, providing actionable advice and in-depth explanations to help you master this beloved classic.
The cornerstone of any superior sugar cookie is the quality of its ingredients. Begin with unsalted butter, preferably European-style, with a higher fat content. This contributes to a richer flavor and a more tender crumb. Ensure the butter is at room temperature, meaning it’s pliable but not melted or greasy. Cold butter will result in tough cookies, while overly warm butter will lead to a greasy dough that spreads excessively during baking. Granulated sugar is essential for sweetness and structure. While some recipes might incorporate a touch of brown sugar for added moisture and depth, for a classic, crisp rolled sugar cookie, pure granulated sugar is paramount. The eggs, also at room temperature, act as binders and add richness. Using cold eggs can shock the butter, causing it to solidify and creating a less homogenous dough. Vanilla extract is the primary flavoring agent. Opt for pure vanilla extract over imitation; the difference in flavor is significant. A good quality vanilla will elevate your cookies from good to unforgettable. For the dry ingredients, all-purpose flour is the standard. It’s crucial to measure flour correctly; spooning it into the measuring cup and leveling it off is far more accurate than scooping directly from the bag, which can lead to too much flour and dry, crumbly cookies. Baking powder or baking soda (or a combination) provides leavening, ensuring the cookies rise slightly and achieve a delicate texture. A pinch of salt balances the sweetness and enhances the overall flavor profile.
Creaming the butter and sugar is a critical step that cannot be rushed. This process incorporates air into the mixture, which is vital for the cookies’ texture and rise. Using an electric mixer (stand mixer with a paddle attachment or a hand mixer) is highly recommended. Begin by beating the softened butter until it’s smooth and creamy. Gradually add the granulated sugar, continuing to beat on medium speed for several minutes until the mixture is light, fluffy, and pale yellow. This aerated base will prevent the cookies from being dense. Scrape down the sides of the bowl frequently to ensure all the butter and sugar are incorporated. Overmixing at this stage can break down the sugar crystals, reducing their ability to create air pockets. The goal is a consistent, airy emulsion.
Once the butter and sugar are perfectly creamed, it’s time to add the eggs and vanilla extract. Add the eggs one at a time, beating well after each addition. This ensures each egg is fully incorporated into the batter, preventing a greasy or separated dough. If the mixture looks slightly curdled after adding the eggs, don’t panic; it will often come together as the dry ingredients are added. Beat in the vanilla extract until just combined. The scent of vanilla at this stage is a promising indicator of the deliciousness to come.
The integration of dry ingredients is another area where precision is key. In a separate bowl, whisk together the flour, leavening agent (baking powder or soda), and salt. Whisking ensures these ingredients are evenly distributed, preventing pockets of salt or baking powder in the final cookie. Add the dry ingredients to the wet ingredients in two or three additions, mixing on low speed until just combined. It’s crucial not to overmix the dough once the flour is added. Overmixing develops the gluten in the flour, which will result in tough, chewy cookies. Stop mixing as soon as you no longer see streaks of dry flour. A slightly lumpy dough is preferable to an overmixed, smooth one.
After the dough is mixed, it’s imperative to chill it. This step is non-negotiable for successful rolled sugar cookies. Chilling solidifies the fat in the dough, making it easier to roll out without sticking and preventing excessive spreading during baking. It also allows the gluten to relax, further contributing to a tender cookie. Divide the dough into two or three discs, wrap them tightly in plastic wrap, and refrigerate for at least two hours, or preferably overnight. If you’re short on time, an hour in the freezer can suffice, but be mindful not to freeze the dough solid, as it will become difficult to work with.
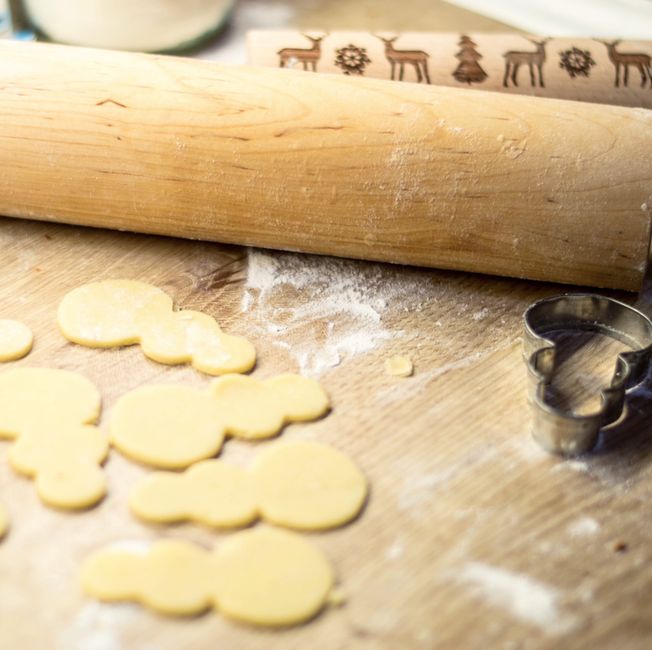
When you’re ready to roll, lightly flour your work surface and your rolling pin. If the dough is very firm, let it sit at room temperature for 5-10 minutes to soften slightly, but avoid letting it become too warm. Roll out one disc of dough at a time, keeping the others chilled. Aim for a uniform thickness of ¼ inch. This ensures even baking. If the dough cracks as you roll, it’s likely too cold. Gently knead it a few times or let it warm up slightly. If it’s too soft and sticky, add a whisper of flour to the surface and rolling pin. A dough mat can be helpful for preventing sticking. Rotate the dough frequently and dust lightly with flour as needed.
Using cookie cutters, cut out your desired shapes. For clean cuts, press straight down with the cutters without twisting. Gather the scraps, gently re-knead them (without overworking), flatten them into a disc, and chill again before rolling and cutting. This minimizes the amount of handling, which helps maintain tenderness. Place the cut cookies on baking sheets lined with parchment paper. Parchment paper prevents sticking and makes for easy cleanup. Leave about 1-2 inches of space between cookies to allow for slight spreading.
Chilling the cut cookies again before baking is an often-overlooked but highly effective step. Transfer the baking sheets to the refrigerator for another 15-30 minutes. This further firms up the dough, ensuring the cookies hold their shape beautifully during baking and minimizing spread. This step is particularly important for intricate cutters or when you want very sharp edges.
Baking temperature and time are crucial for achieving the perfect texture. Preheat your oven to 350°F (175°C). This moderate temperature allows the cookies to bake through without burning on the edges. Bake for 8-12 minutes, depending on the size and thickness of your cookies. The cookies are done when the edges are lightly golden brown, and the centers appear set and slightly puffed. They will continue to cook on the hot baking sheet after removal from the oven. Avoid overbaking, which will result in dry, hard cookies. It’s better to slightly underbake and let them finish on the sheet.
Allow the cookies to cool on the baking sheets for 2-3 minutes before carefully transferring them to a wire rack to cool completely. This prevents them from breaking when they are still warm and fragile. Once fully cooled, they are ready for decorating or enjoying as is.
The decorating possibilities for rolled sugar cookies are endless, offering a canvas for creativity. Royal icing is the classic choice for intricate designs and smooth finishes. It dries hard, allowing for layering and detailed work. For simpler decorations, a basic buttercream or glaze can be used. Edible glitter, sprinkles, and sanding sugar add sparkle and texture. When decorating, ensure the cookies are completely cool, otherwise, your icing will melt.
For optimal storage, keep cooled, undecorated cookies in an airtight container at room temperature for up to a week. If decorated with royal icing, they can also be stored at room temperature in an airtight container. For longer storage, both undecorated and decorated cookies can be frozen. Wrap them tightly in plastic wrap and then place them in a freezer-safe bag or container. They can be frozen for up to 3 months. Thaw at room temperature.
Mastering rolled sugar cookies involves understanding how each ingredient and step contributes to the final outcome. The creaming process, precise flour measurement, adequate chilling, uniform rolling, and careful baking are all integral to achieving that perfect balance of crisp edges and a tender, flavorful interior. With practice and attention to detail, you can consistently produce these timeless treats, perfect for holidays, celebrations, or simply a delightful indulgence.


