
Perfect Hard Boiled Eggs

Perfect Hard-Boiled Eggs: The Ultimate Guide to Flawless Results
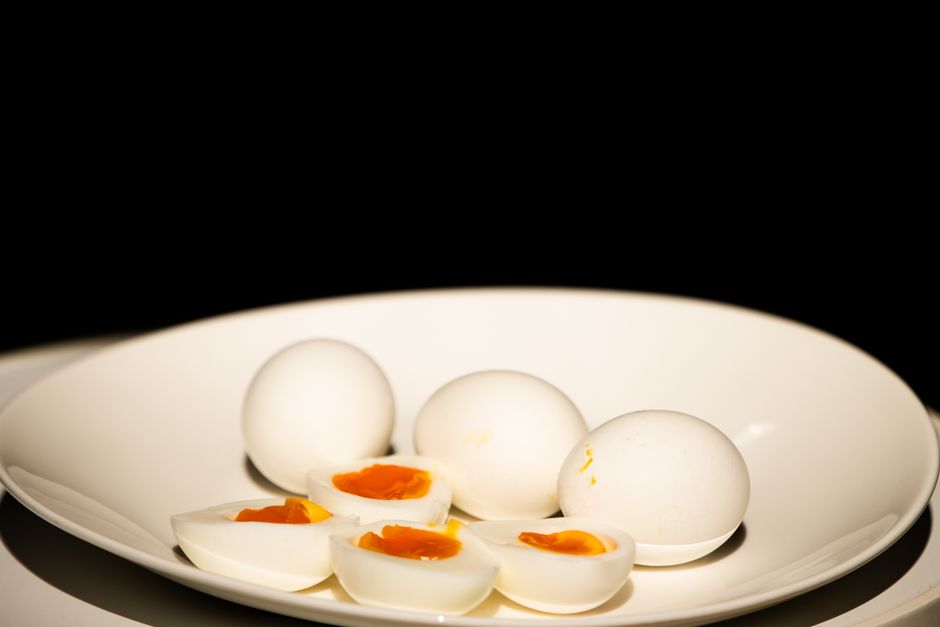
Achieving consistently perfect hard-boiled eggs is a culinary triumph, a seemingly simple task that often eludes even experienced home cooks. The ideal hard-boiled egg boasts a fully cooked, yet still tender, yolk that is vibrantly yellow and never chalky or greenish. The white should be firm, opaque, and easily peelable, free from the stubborn, thin membrane that clings stubbornly to the shell. This guide delves deep into the science and practical techniques behind creating flawless hard-boiled eggs every single time, ensuring your egg-cellent creations are a staple for breakfasts, salads, snacks, and countless other dishes. We will explore optimal egg freshness, precise water temperatures, cooking durations, and the crucial cooling process, all contributing to a superior outcome.
The foundation of any perfect hard-boiled egg lies in the quality and age of the eggs themselves. Fresher eggs, while often touted for their superior taste and texture in other applications like poaching or frying, can present a significant peeling challenge when hard-boiled. The reason for this lies in the egg white’s pH. As an egg ages, its pH increases, causing the white to become less viscous and less tightly bound to the shell membrane. This makes them significantly easier to peel. Therefore, for hard-boiled eggs, it’s generally recommended to use eggs that are at least a week to ten days old. Older eggs, while still safe to consume, might exhibit a slightly less firm white, but the ease of peeling usually outweighs this minor difference for this specific cooking method. Storing eggs in the refrigerator, point-down, helps to keep the yolk centered and reduces air cell expansion, further contributing to better results. Avoid washing eggs before storing them, as this removes the natural protective bloom that prevents bacterial contamination.
The cooking vessel and the amount of water used are also critical factors. A saucepan that is large enough to hold the eggs in a single layer without overcrowding is essential. Overcrowding can lead to uneven cooking, as some eggs might be submerged deeper than others, resulting in varying degrees of doneness. Similarly, an insufficient amount of water will not provide adequate insulation and heat distribution, potentially leading to hot spots and inconsistent cooking. The general rule of thumb is to cover the eggs with at least one inch of cold water. This ensures that the eggs are fully submerged and that there’s enough thermal mass to maintain a consistent temperature throughout the cooking process. Using a lid on the saucepan is also highly recommended. The lid traps steam, which aids in even cooking and helps to prevent the water temperature from dropping too rapidly when the eggs are added.
The method of initiating the cooking process – whether starting with cold water or boiling water – has a profound impact on both the texture of the egg white and the ease of peeling. The cold water start method, which is widely considered the most reliable for achieving perfect hard-boiled eggs, involves placing the eggs in a saucepan and covering them with cold water. This gradual heating process allows the egg white to cook more evenly and gently, preventing it from becoming rubbery or tough. As the water heats, the proteins in the egg white coagulate gradually. This gentle coagulation contributes to a more tender white and, importantly, helps to create a slight separation between the white and the shell membrane, facilitating easier peeling. Once the water reaches a rolling boil, the heat is then reduced, and the eggs are simmered for a specific duration. This controlled cooking prevents the rapid, shock-like heating that can occur with a boiling water start, which can lead to a tougher exterior and more difficult peeling.
The timing of the hard-boiling process is arguably the most crucial element in achieving the desired yolk consistency. Overcooked yolks are a common pitfall, characterized by a dry, chalky texture and a distinctive greenish-gray ring around the outside. This discoloration is a result of a chemical reaction between iron in the yolk and sulfur in the egg white at high temperatures. To avoid this, precise timing is paramount. For a perfectly cooked, firm yet tender yolk, the simmering time after the water reaches a rolling boil and is then reduced to a gentle simmer is typically between 9 and 12 minutes. A 9-minute simmer will yield a yolk that is fully cooked but still retains a slight creaminess in the very center. 10-11 minutes will produce a classic firm, bright yellow yolk. 12 minutes will result in a fully solid yolk, still avoiding the dreaded green ring. The exact duration can vary slightly based on the size of the eggs and the altitude, but these benchmarks are an excellent starting point. It is essential to have a timer readily available and to accurately measure the time from when the water begins to simmer gently.
The transition from cooking to cooling is as vital as the cooking itself. Once the predetermined simmering time has elapsed, the eggs must be rapidly cooled to halt the cooking process immediately. This not only prevents overcooking and the formation of the green ring but also plays a significant role in making the eggs easier to peel. The rapid cooling process causes the egg white to contract slightly, pulling away from the shell membrane. The best method for rapid cooling is an ice bath. Prepare a bowl filled with ice cubes and cold water. Carefully transfer the cooked eggs from the simmering water directly into the ice bath using a slotted spoon. Allow the eggs to remain in the ice bath for at least 10 to 15 minutes, or until they are completely cooled to the touch. The shock of the cold water is what solidifies the white quickly and encourages the separation from the shell. Simply running the eggs under cold tap water is not as effective as an ice bath.
The peeling process itself can be a source of frustration. However, employing a few simple techniques can transform this often-dreaded task into a smooth and satisfying experience. Once the eggs are thoroughly chilled in the ice bath, the peeling can commence. Gently tap the wider end of the egg on a hard surface. This is where the air cell is located, and it’s usually the easiest starting point for peeling. Then, gently roll the egg on the surface, applying even pressure, to create a network of fine cracks all over the shell. This helps to break the shell into smaller, more manageable pieces. The next step is to peel under cool running water. The water acts as a lubricant, flushing away small shell fragments and helping to loosen the membrane. Start peeling from the wider end, and with a little patience, the shell should come off in large, relatively intact pieces. If you encounter stubborn spots, gently scrape them away with your fingernail or the tip of a knife. Some cooks swear by cracking the egg all over and then rolling it firmly between their palms before attempting to peel; this can also be an effective technique for loosening the shell.
Beyond the fundamental techniques, several advanced tips and tricks can further elevate your hard-boiled egg game. For consistently centered yolks, especially if using very fresh eggs, consider gently stirring the eggs in the cold water for the first few minutes of heating. This gentle movement helps to keep the yolk suspended in the center of the egg. For an extra level of flavor and to enhance the brightness of the yolk, a pinch of salt can be added to the cooking water. Salt can also marginally aid in the coagulation process. To ensure uniform cooking and prevent cracking, avoid cooking eggs that are directly from the refrigerator. Allow them to sit at room temperature for about 15-30 minutes before cooking. This gradual warming reduces the thermal shock when they hit the hot water. For those who are particularly sensitive to the sulfurous smell sometimes associated with hard-boiled eggs, adding a teaspoon of vinegar to the cooking water can help to neutralize this odor.
The versatility of perfect hard-boiled eggs is immense. They are a cornerstone of classic egg salad sandwiches, a beautiful and protein-rich addition to green salads, and a convenient snack for on-the-go. Deviled eggs, a party favorite, rely on perfectly cooked yolks for their creamy texture and vibrant flavor. For a quick and healthy breakfast, simply sprinkle with a little salt and pepper. Their shelf life in the refrigerator, once peeled, is typically 5-7 days, making them an excellent item to prepare in advance for the week. Unpeeled hard-boiled eggs will last longer, up to a week to 10 days, maintaining their freshness and flavor. Storing them in their shells and peeling them as needed preserves their moisture and prevents them from drying out. When storing peeled eggs, it’s advisable to keep them in an airtight container to prevent them from absorbing odors from other foods in the refrigerator.
The science behind the perfect hard-boiled egg is a fascinating interplay of protein coagulation, pH levels, and temperature control. Understanding these fundamental principles allows for consistent success. The protein chains in egg whites, primarily albumin, begin to denature and unfold when exposed to heat. As they unfold, they interact with each other, forming a three-dimensional network that traps water and solidifies the white. The rate at which this process occurs is directly influenced by temperature. A rapid temperature increase, as seen in a boiling water start, can cause the exterior proteins to coagulate too quickly, forming a tough barrier that inhibits even cooking. The slower, controlled heating of the cold water start method allows the proteins to denature and reform more gradually, resulting in a tenderer, more uniformly cooked white. The yolk, composed of fats and proteins, also coagulates, but at a slightly different temperature and rate than the white. Overcooking pushes the yolk past its ideal solid state, leading to the undesirable chalky texture and the formation of ferrous sulfide, the greenish ring. The rapid cooling is essential to prevent this continued cooking and to promote the desirable separation of the white from the shell.
In summary, achieving perfect hard-boiled eggs is a skill honed through understanding the interplay of egg freshness, proper water levels, controlled heating, precise timing, and rapid cooling. By adhering to these principles, consistently producing eggs with bright, tender yolks and easily peelable whites becomes an achievable reality, opening up a world of culinary possibilities. The investment of a little attention to detail will reward you with a staple food item that is both delicious and incredibly versatile, elevating your everyday meals and special occasions alike. Master these techniques, and you’ll never look back at a stubbornly unpeeled egg or a discolored yolk with frustration again.


