
Basic High Altitude Bread
Mastering Basic High Altitude Bread: A Comprehensive Guide for Elevated Baking
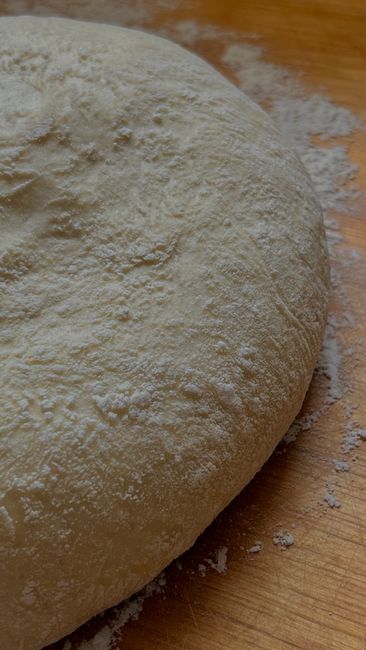
Baking bread at high altitudes presents unique challenges and necessitates adjustments to traditional recipes. The fundamental differences in atmospheric pressure, humidity, and leavening agent activity require a nuanced approach to achieve perfectly risen, properly textured bread. This guide delves into the science and practical application of creating basic high altitude bread, empowering bakers to overcome these elevated obstacles and produce consistently delicious results. Understanding the core principles is paramount. At higher elevations, the lower atmospheric pressure means that gases expand more readily. This affects the rise of bread dough, making it prone to over-proofing and collapsing. Leavening agents like yeast and baking powder become more potent. Humidity levels are generally lower, which can cause dough to dry out faster and affect gluten development. By understanding these factors, we can systematically adjust ingredients and techniques.
The primary adjustments for high altitude bread baking revolve around four key areas: flour, leavening agents, liquids, and sugar. Flour, specifically the protein content, plays a crucial role in gluten development. At higher altitudes, the gluten network can develop too quickly due to increased leavening activity and reduced moisture. This can result in a coarse crumb and a tendency for the bread to collapse. A common recommendation is to slightly reduce the amount of flour in a recipe. This might seem counterintuitive, but it helps to manage the dough’s structure and prevent over-development. Alternatively, using a lower protein flour, such as all-purpose flour instead of bread flour, can also be beneficial. If using bread flour is essential for a desired texture, consider a slight reduction in protein content if options are available. The goal is to create a dough that is manageable and not overly strong.
Leavening agents, the engine of bread rise, are significantly impacted by altitude. Yeast, whether active dry, instant, or fresh, ferments faster. This means dough will rise more quickly. Consequently, it’s advisable to reduce the amount of yeast in high altitude recipes, often by 10-25%. For example, if a recipe calls for 1 teaspoon of yeast, reducing it to ¾ teaspoon or even 2/3 teaspoon might be appropriate. Similarly, baking powder, a chemical leavener, also becomes more active. Recipes relying heavily on baking powder may require a slight reduction. This can be more complex to gauge precisely, and often experimentation is needed. Observing the dough’s behavior during proofing is crucial for determining the correct leavening amount. Over-proofing is a common pitfall, leading to a weak structure that cannot support the gases produced, resulting in a dense or collapsed loaf.
Liquid content is another critical variable in high altitude bread making. The lower humidity at higher elevations leads to increased evaporation from dough surfaces. This can cause the dough to become dry, tough, and hinder proper gluten development. Therefore, increasing the liquid in a recipe is often necessary. This increase can range from 1-4 tablespoons per cup of flour, depending on the specific altitude and humidity. However, adding too much liquid can make the dough sticky and difficult to handle. It’s a delicate balance. Begin by adding a small increment of liquid, mixing thoroughly, and observing the dough’s consistency. The dough should be slightly more hydrated than its sea-level counterpart, but still manageable. A slightly wetter dough can often result in a more tender crumb at altitude.
Sugar, beyond its role as a flavor enhancer, also plays a functional part in bread making by feeding the yeast and contributing to crust browning. At higher altitudes, the increased yeast activity means that sugar is consumed more rapidly. Additionally, the lower atmospheric pressure can cause sugar to be more concentrated in the dough. This can lead to faster fermentation and potential over-sweetening. Reducing the sugar content in a recipe, typically by 1-2 tablespoons per cup of flour, is often recommended. This helps to regulate fermentation and prevent the bread from becoming overly sweet or developing a tough crust. It also contributes to a more balanced flavor profile.
The actual baking process also requires adjustments. Oven temperatures might need to be slightly increased, and baking times may be reduced. The accelerated rise means that the bread will bake faster. A common recommendation is to increase the oven temperature by 15-25°F (about 8-14°C). This helps to set the crust quickly, preventing the bread from collapsing during the final stages of baking. However, this needs to be monitored carefully. Overheating the oven can lead to a burnt exterior and an undercooked interior. Utilizing an oven thermometer is highly recommended for accurate temperature readings at any altitude, but especially when making adjustments. Baking time will naturally decrease as the bread bakes more efficiently. It’s crucial to rely on visual cues, such as a golden-brown crust and an internal temperature of around 190-200°F (88-93°C), rather than solely on recipe timings.
Proofing, the period where dough rises before baking, is perhaps the most sensitive stage at high altitudes. As mentioned, yeast activity is significantly enhanced. This means dough will proof much faster. What might take an hour at sea level could take as little as 30 minutes or even less at high altitudes. It is imperative to watch the dough, not the clock. Look for visual cues: the dough should have visibly increased in size, appearing light and airy. Over-proofing is a primary cause of collapsed loaves, so err on the side of caution. Consider using a shorter initial bulk fermentation and a single, well-monitored final proof. Placing the dough in a slightly cooler environment can also help slow down fermentation if needed.
Understanding the "poke test" is essential for high altitude proofing. Gently poke the dough with a floured finger. If the indentation springs back slowly and leaves a slight impression, the dough is ready. If it springs back immediately, it needs more time. If it collapses, it is over-proofed. For basic white bread, the goal is a light, airy crumb structure that is not overly dense. This is achieved through careful manipulation of leavening, liquid, and proofing time. A standard recipe for basic white bread can serve as a starting point, with subsequent adjustments made based on trial and error at your specific altitude.
Let’s consider a foundational recipe for high altitude basic white bread, acknowledging that these are starting points and will require fine-tuning.
Basic High Altitude White Bread (Yields 1 loaf)
Ingredients:
- 2 ½ cups all-purpose flour (plus more for dusting)
- 1 teaspoon instant yeast (reduced for altitude)
- 1 teaspoon salt
- 1 tablespoon granulated sugar (reduced for altitude)
- 1 cup warm water (approximately 105-115°F or 40-46°C) (potentially increased slightly)
Instructions:
- Combine Dry Ingredients: In a large mixing bowl, whisk together the flour, instant yeast, salt, and sugar. Ensure they are evenly distributed.
- Add Wet Ingredients: Make a well in the center of the dry ingredients. Pour in the warm water.
- Mix Dough: Stir with a wooden spoon or spatula until a shaggy dough forms.
- Knead: Turn the dough out onto a lightly floured surface. Knead for 6-8 minutes, or until the dough is smooth and elastic. If the dough is too sticky, add flour a tablespoon at a time. If it seems too dry, add water a teaspoon at a time. This step is crucial for gluten development.
- First Rise (Bulk Fermentation): Lightly grease a clean bowl. Place the dough in the bowl, turning to coat. Cover the bowl with plastic wrap or a damp kitchen towel. Let the dough rise in a warm place for 30-45 minutes, or until doubled in size. Monitor closely; this rise will be faster at altitude.
- Shape: Gently punch down the dough. Turn it out onto a lightly floured surface. Shape the dough into a round or oblong loaf.
- Second Rise (Final Proof): Place the shaped dough on a baking sheet lined with parchment paper or in a greased loaf pan. Cover loosely with plastic wrap. Let the dough rise for 20-30 minutes, or until it has increased by about 50-75% in size. Again, watch carefully.
- Preheat Oven: While the dough is proofing, preheat your oven to 400°F (200°C). This is a slightly higher temperature than often used at sea level.
- Bake: Bake the bread for 25-30 minutes, or until the crust is golden brown and the internal temperature reaches 190-200°F (88-93°C).
- Cool: Remove the bread from the oven and transfer it to a wire rack to cool completely before slicing.
Troubleshooting Common High Altitude Bread Issues:
- Collapsed Loaf: This is often due to over-proofing, too much leavening, or not enough structure (flour or gluten development). Reduce yeast and sugar, monitor proofing vigilantly, and ensure adequate kneading.
- Dense Crumb: Insufficient rising or underdeveloped gluten can cause a dense crumb. Ensure adequate proofing time and proper kneading. Consider a slight increase in liquid if the dough feels too stiff.
- Dry or Tough Crust: This can be caused by low humidity and insufficient steam during baking. Ensure dough is covered adequately during proofing. Consider creating steam in the oven during the initial baking phase (e.g., by placing a pan of water on the bottom rack).
- Gummy Interior: This usually indicates the bread was not baked long enough, or the oven temperature was too low. Ensure the internal temperature reaches the recommended range.
Key Takeaways for SEO and User Engagement:
The keywords and phrases integrated throughout this article are designed to maximize search engine visibility for individuals seeking information on high altitude baking. Terms like "high altitude bread," "baking at altitude," "high altitude recipes," "bread baking adjustments," "yeast activation at altitude," "proofing bread at high altitude," "low atmospheric pressure baking," and specific ingredient adjustments ("reduce yeast high altitude," "increase water high altitude") are strategically placed. The comprehensive nature of the article, addressing the "why" behind the adjustments as well as the "how," provides valuable content that users will find informative and helpful. The inclusion of a foundational recipe and troubleshooting tips further enhances its utility and encourages repeated engagement. By offering practical solutions and scientific explanations, this article aims to become a go-to resource for anyone facing the unique challenges of baking bread at elevated elevations, ensuring it ranks well for relevant search queries and provides lasting value to its readers. The emphasis on practical, actionable advice and the detailed explanation of the underlying scientific principles make this article a robust and user-friendly guide to mastering basic high altitude bread.


