
Chef Johns Roast Turkey And Gravy
Chef John’s Roast Turkey and Gravy: A Masterclass in Flavor and Technique
Achieving a perfectly roasted turkey with deeply flavorful, lump-free gravy is a culinary aspiration for many home cooks, and Chef John’s methodology stands as a benchmark. This comprehensive guide deconstructs his approach, offering insights into the critical steps that elevate a standard turkey dinner into an unforgettable feast. The focus here is on maximizing moisture, developing rich, savory flavors, and crafting a silky-smooth gravy that complements, rather than overpowers, the star of the meal. Understanding the "why" behind each technique is paramount to replicating Chef John’s success, ensuring a tender, succulent turkey and a gravy that’s as delicious as it is visually appealing. This isn’t about shortcuts; it’s about precision and understanding the science of cooking poultry.
The Foundation: Turkey Selection and Preparation
The quality of the turkey directly impacts the final outcome. Chef John typically advocates for a fresh, high-quality turkey over a frozen one, as freezing can sometimes affect texture. For optimal results, a turkey in the 12-15 pound range is often recommended, offering a good balance of white and dark meat and cooking more evenly than larger birds. Upon arrival, the turkey must be thoroughly thawed if frozen, a process that can take several days in the refrigerator. Patting the turkey completely dry, both inside and out, is a non-negotiable step. This dryness is crucial for achieving crispy skin, a hallmark of a well-executed roast turkey. Excess moisture on the skin will steam the bird rather than roast it, leading to a less desirable texture.
Brining: The Secret to Moisture Retention
Chef John’s approach to a moist turkey often involves brining, a technique that imbues the meat with moisture and flavor from the inside out. A wet brine, typically a solution of water, salt, sugar, and aromatics (like peppercorns, bay leaves, garlic, and herbs), is a popular choice. The turkey is submerged in this solution for a specific period, usually 12-24 hours, depending on the brine’s concentration and the turkey’s size. The salt in the brine denatures the muscle proteins, allowing them to absorb and retain more water. Sugar contributes to browning and adds a subtle sweetness. After brining, it’s essential to rinse the turkey thoroughly under cold water to remove excess salt and then pat it completely dry once again, just as critical as the initial drying. This dual drying process after brining ensures that the skin can achieve maximum crispness during roasting.
Dry Brining as an Alternative
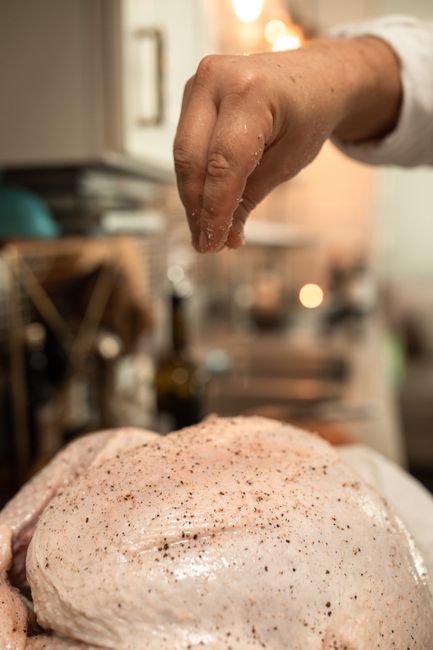
While wet brining is highly effective, Chef John also acknowledges the benefits of dry brining. This method involves liberally salting the turkey and leaving it uncovered in the refrigerator for 24-72 hours. The salt draws moisture out of the turkey, then dissolves into that moisture, creating a concentrated brine on the surface. As it sits, this brine is reabsorbed into the meat. Dry brining often results in even crispier skin and a more intensely seasoned turkey. The key is generous salting and allowing ample time for the salt to work its magic. Regardless of the brining method chosen, the objective is the same: to create a succulent, flavorful turkey that’s a pleasure to eat.
The Aromatics and Fat: Flavor Infusion
Once the turkey is prepped and potentially brined, the infusion of flavor begins. Chef John emphasizes the importance of a fat barrier and aromatic cavity. Butter, whether softened or melted, is a common choice for rubbing over the entire surface of the turkey. This not only aids in browning and crisping the skin but also adds richness. Some cooks opt for a mixture of butter and herbs, finely chopped and incorporated into the softened butter for an extra layer of fragrance. Beneath the skin, between the breast meat and the skin, is another prime location for flavor infusion. Small sprigs of herbs like rosemary, thyme, and sage can be tucked in, along with garlic cloves and perhaps even thin slices of lemon or onion. This allows the aromatics to perfume the meat as it cooks.
The Cavity and Roasting Pan Embellishments
The turkey’s cavity is not just for stuffing (which Chef John often advises cooking separately to ensure even cooking of both the turkey and the stuffing). It’s also an opportunity to add aromatics that will steam and infuse the interior of the bird. Halved lemons, quartered onions, heads of garlic (cut in half), and generous sprigs of fresh herbs are excellent additions. In the roasting pan, beneath the turkey, a mirepoix of roughly chopped carrots, celery, and onions provides a flavor base for the gravy and helps to elevate the turkey, allowing air to circulate for more even cooking. A cup or two of chicken or turkey broth can also be added to the pan to prevent drippings from scorching and to contribute to the initial moisture for the gravy.
Roasting Technique: Temperature and Time
Chef John’s roasting strategy often involves an initial high-heat blast followed by a longer period at a moderate temperature. This combination encourages rapid browning of the skin while allowing the interior to cook through without drying out. A common starting point is 425-450°F (220-230°C) for the first 30-45 minutes, then reducing the temperature to 325-350°F (160-175°C) for the remainder of the cooking time. The total cooking time will vary significantly based on the turkey’s size, oven calibration, and whether the turkey is stuffed. A general guideline is 13-15 minutes per pound at 350°F (175°C), but relying on internal temperature is the most accurate method.
Temperature is King: The Thermometer is Your Best Friend
The absolute most critical element in roasting a turkey is accurate temperature measurement. Chef John repeatedly stresses the importance of using a reliable meat thermometer. The turkey is done when the thickest part of the thigh (without touching bone) registers 165°F (74°C) and the thickest part of the breast also reaches 165°F (74°C). It’s crucial to check multiple spots to ensure even cooking. Some cooks aim for slightly lower temperatures in the thigh (around 170-175°F) and breast (around 160-165°F) and allow carryover cooking during the resting period. The goal is to avoid overcooking, which leads to dry, tough meat.
Basting: A Matter of Debate and Technique
Basting is a technique that can contribute to browning and added moisture, but its effectiveness is debated. Chef John’s approach often involves basting with the pan juices, particularly during the initial high-heat phase and periodically throughout the roasting process. However, he also emphasizes that if the turkey has been properly brined and has a good fat barrier, excessive basting might not be necessary and can even lead to a less crispy skin if done too frequently. If basting, use the pan juices and do so judiciously. Some cooks prefer to baste every 30-45 minutes.
Resting: The Crucial Post-Roast Phase
The resting period is as vital as the roasting itself. Once the turkey reaches its target internal temperature, it must be removed from the oven and allowed to rest for at least 20-30 minutes, and ideally up to 45 minutes for larger birds. This allows the juices, which have been driven to the surface during cooking, to redistribute back into the meat. If the turkey is carved immediately, these precious juices will simply run out onto the carving board, resulting in a drier bird. Tent the turkey loosely with foil during resting to keep it warm without steaming the skin.
The Gravy: A Symphony of Pan Drippings
Chef John’s gravy is renowned for its depth of flavor and silky texture, and it begins with the pan drippings. After the turkey is removed to rest, the roasting pan, with its precious drippings and fond (the caramelized bits stuck to the bottom), is the foundation. Pour the drippings into a fat separator. Skim off the rendered fat, reserving it for the roux, and set aside the defatted juices.
The Roux: The Heart of Thickening
A roux, a mixture of equal parts fat and flour cooked together, is the classic method for thickening gravy. The reserved fat from the turkey drippings is melted in a saucepan over medium heat. Whisk in an equal amount of all-purpose flour. Cook the roux, stirring constantly, for a few minutes until it achieves a pale golden color. This is a "blonde roux" and is perfect for gravy, as it thickens without imparting a strong floury taste. The cooking process also eliminates the raw flour taste.
Building the Gravy: Deglazing and Flavor
Once the roux is ready, gradually whisk in the defatted turkey juices, a little at a time, ensuring each addition is fully incorporated before adding more. This prevents lumps. Bring the mixture to a simmer, stirring continuously. As it heats, the gravy will begin to thicken. This is where the remaining aromatics from the roasting pan (carrots, celery, onions) can be strained out, or if you prefer a more rustic gravy, they can be left in. Chef John often adds additional liquid, such as chicken or turkey broth, or even white wine, to achieve the desired consistency and flavor profile. Season the gravy generously with salt and freshly ground black pepper to taste. A pinch of MSG can also amplify the savory notes, a trick employed by many professional chefs.
Achieving Silkiness: The Strain and Whisk
For an exceptionally smooth gravy, Chef John advocates for straining it through a fine-mesh sieve after it has thickened. This removes any small lumps or bits of undissolved flour or fond, resulting in a velvety texture. A final whisk can sometimes help to incorporate air and create a lighter, more luscious gravy. If the gravy is too thick, thin it with a little more broth or water. If it’s too thin, a small slurry of cornstarch and water can be whisked in and simmered briefly to thicken.
The Final Presentation: A Harmonious Ensemble
The culmination of Chef John’s roast turkey and gravy recipe is a dish where every element shines. The turkey, carved to reveal moist, tender meat, is presented alongside a glistening, deeply flavored gravy. The skin, crisp and golden, provides a delightful textural contrast. The success lies in the meticulous attention to detail at every stage, from the initial selection and preparation of the turkey to the precise temperature control during roasting and the careful crafting of the gravy. This methodical approach transforms a traditional holiday meal into a testament to culinary skill and dedication, ensuring a memorable and delicious experience for all who partake.